Crear y gestionar grupos
Los grupos en Notion te permiten reunir a varias personas para que puedan colaborar con más facilidad. Obtén más información sobre los propietarios de los grupos y sobre cómo crear y gestionar grupos 💼
Ir a la sección de preguntas frecuentesPuedes establecer distintos permisos para cada grupo y equipo, sin necesidad de dividir a los usuarios en distintos espacios de trabajo. Solo tienes que crear grupos dentro del mismo espacio de trabajo y conceder distintos niveles de acceso a cada página.

Nota: Solo los miembros del espacio de trabajo pueden asignarse a grupos. Los grupos no pueden contener invitados del espacio de trabajo.
Los propietarios de espacios de trabajo y los administradores de miembros pueden crear y editar grupos. Para ello:
Ve a
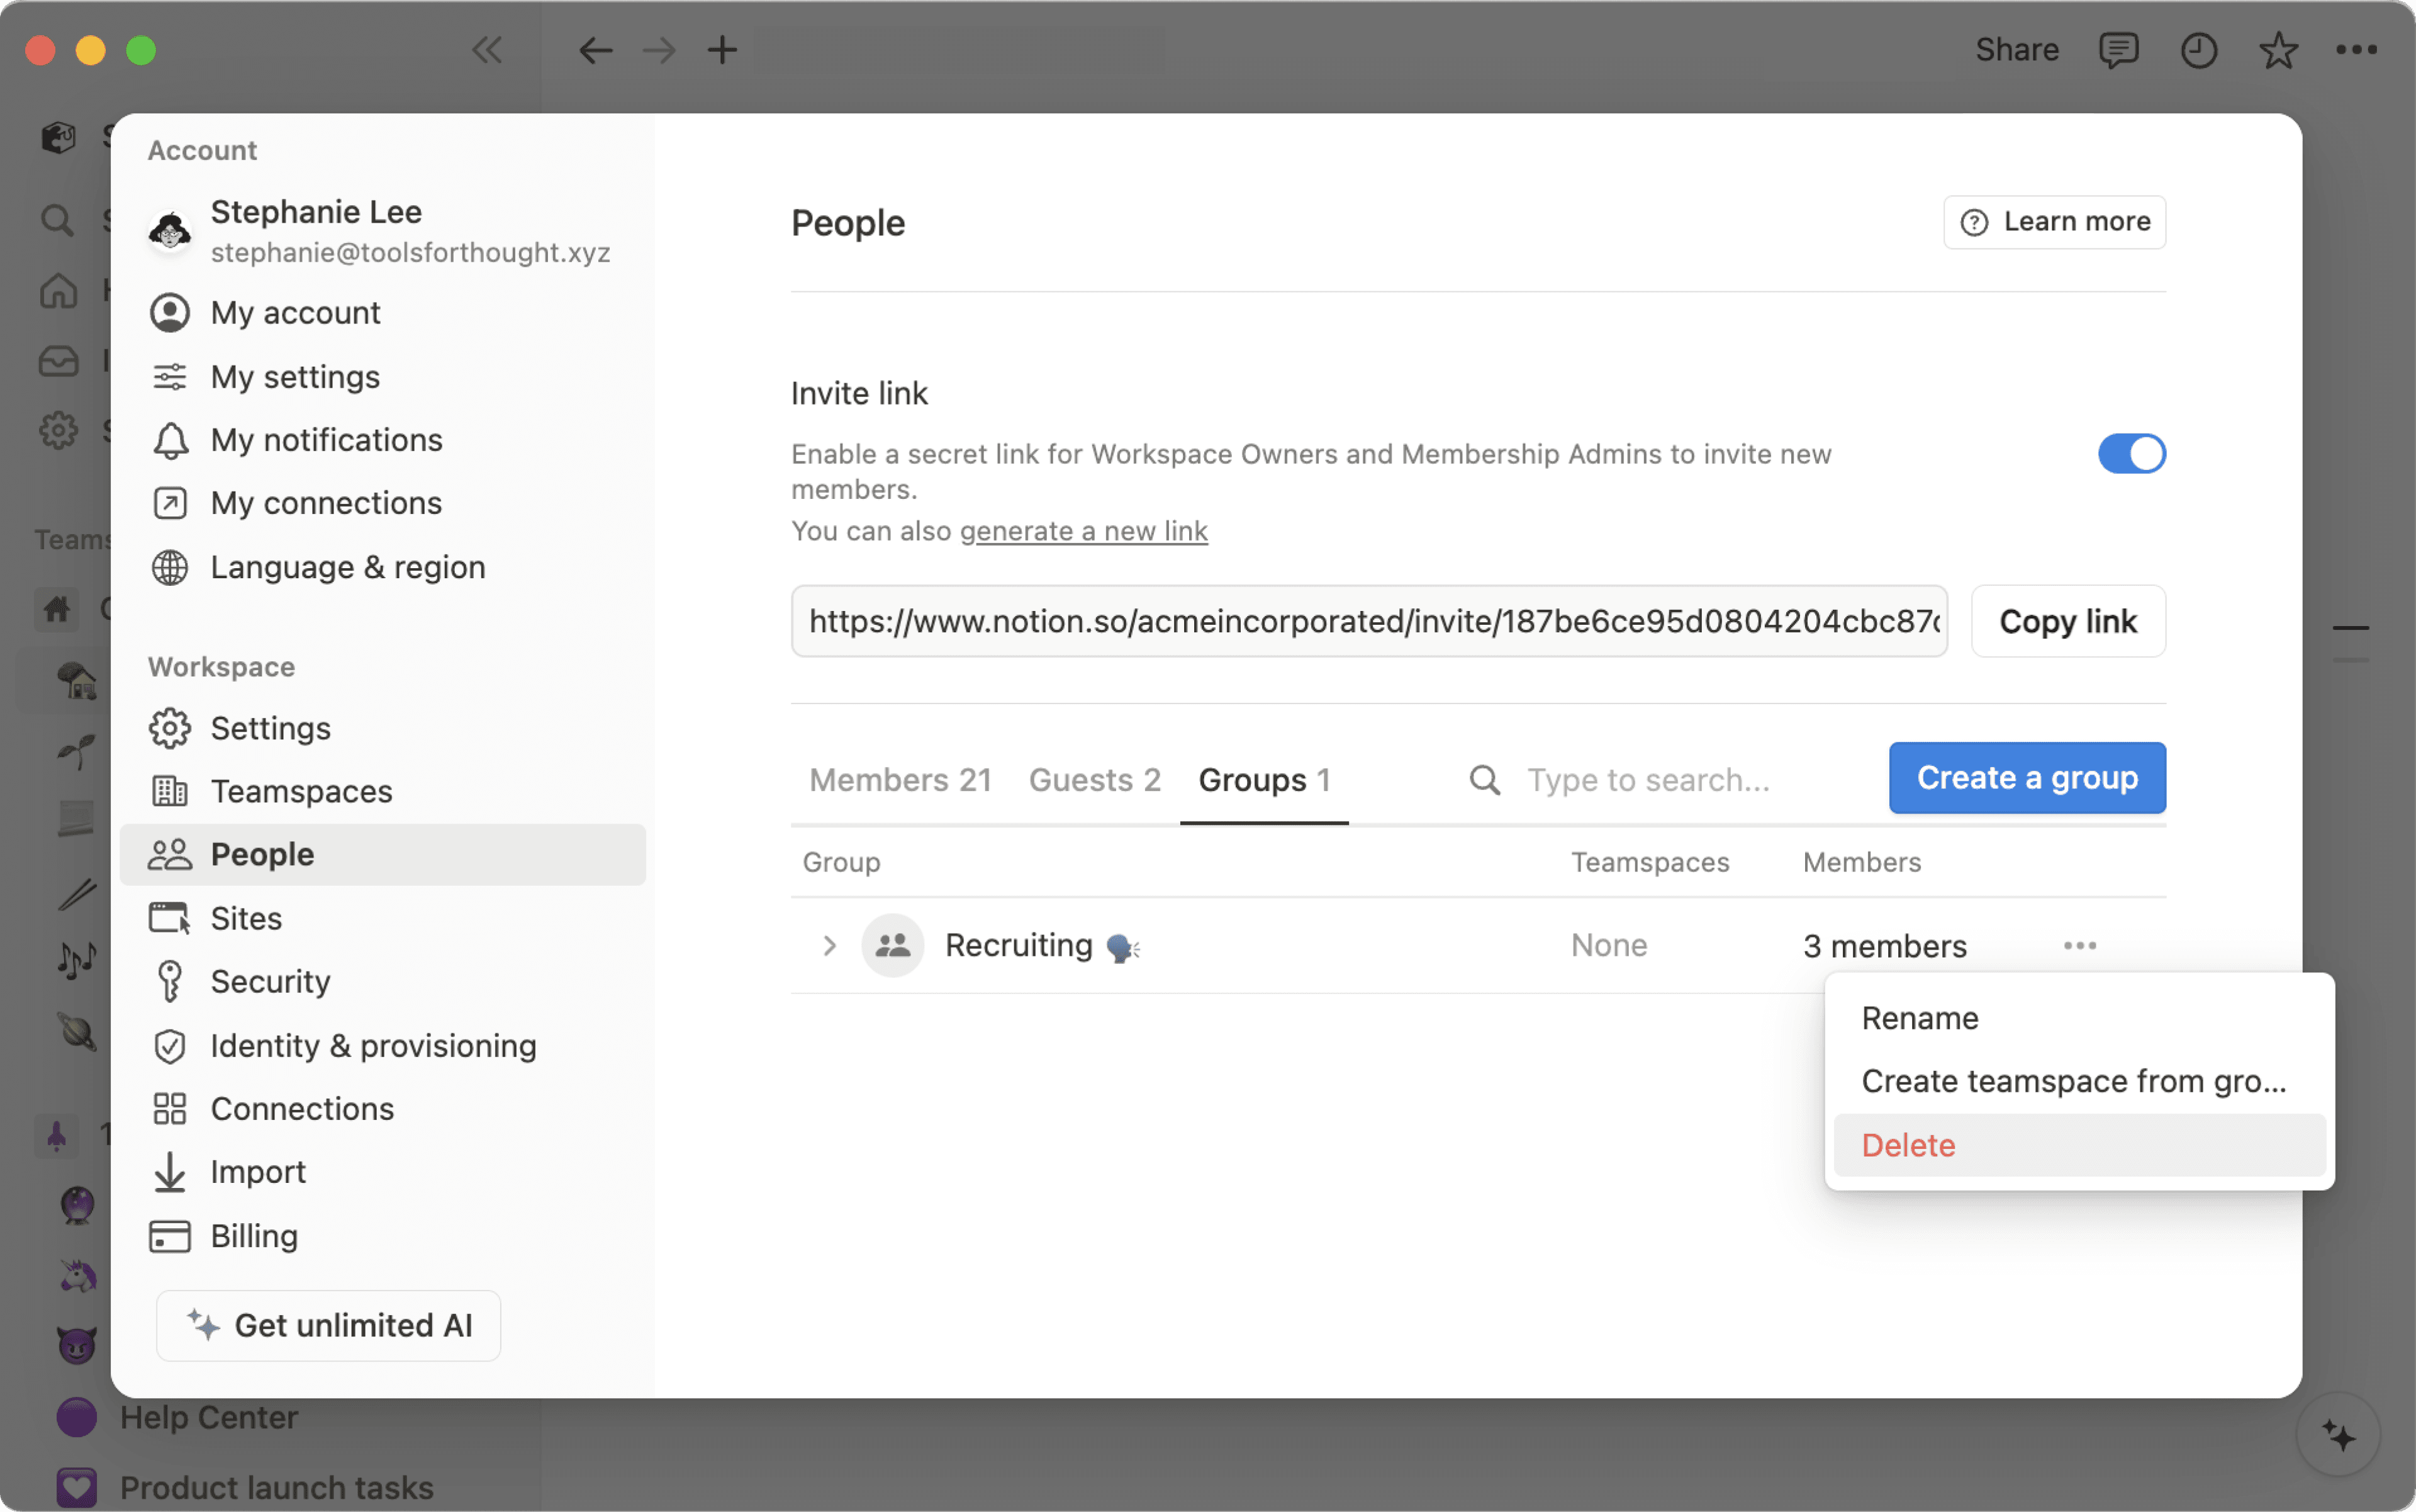
Configuración→PersonasoMiembros(en función de cuál sea tu plan) →Grupos.Selecciona
Crear un grupoy escribe un nombre para tu grupo. Para configurar un icono para el grupo, simplemente haz clic en el icono del emoji que aparece al pasar el cursor.Abre tu nuevo grupo y selecciona
Añadir miembros.Añade todos los miembros que quieras a cualquier grupo.
También puedes hacer clic en
Eliminara la derecha de cualquier miembro del grupo.Selecciona
•••junto a un grupo paracambiarle el nombre,crear un espacio de equipo a partir del grupooeliminarlo.Siempre puedes buscar el nombre o la dirección de correo electrónico de cualquier persona para averiguar a qué grupos pertenece.
Si tu espacio de trabajo permite que los miembros creen grupos, cualquier miembro podrá seleccionar Crear un grupo. La persona que cree el grupo se convertirá en el propietario de forma predeterminada.
Los propietarios de espacios de trabajo y los administradores de miembros pueden asignar o gestionar a los propietarios de grupos.
Para añadir o gestionar propietarios de grupos:
Ve a
Configuración→Miembros.Selecciona el menú de tres puntos junto a un miembro.
Selecciona
Convertir en propietario del grupooEliminar del grupo.
Los propietarios de los grupos pueden gestionar un grupo específico sin necesidad de ser propietarios del espacio de trabajo ni administradores de miembros. En función de la configuración de tu espacio de trabajo, los propietarios de los grupos pueden:
Añadir o eliminar miembros del grupo.
Eliminar el grupo.
Cambiar el nombre del grupo.
Asignar a otros propietarios del grupo y convertirlos en miembros.
Crear espacios de equipo a partir de un grupo o eliminar asociaciones de espacios de equipo de un grupo.
Los propietarios de espacios de trabajo y los administradores de miembros pueden asignar a uno o varios propietarios a un grupo. Los propietarios de los grupos no pueden gestionar otros grupos a menos que también sean propietarios del espacio de trabajo o administradores de miembros.
Si tu organización aprovisiona grupos a través de SCIM, algunos pueden estar etiquetados como Sincronizados. Estos grupos los gestiona tu proveedor de identidades (como Okta o Microsoft Entra ID).
Si intentas cambiar el nombre de un grupo sincronizado o modificar su suscripción en Notion, verás una advertencia. Los cambios realizados en tu proveedor de identidades pueden sobrescribir las modificaciones realizadas en Notion.
Para obtener más información sobre el aprovisionamiento de SCIM, consulta este artículo.
Puedes elegir qué grupos pueden leer, comentar, editar y compartir una página. Para compartir una página con un grupo, sigue estos pasos:
Haz clic en
Compartiry, a continuación, enInvitar. Verás todos los grupos en parte de abajo de la ventana emergente.Elige un grupo y, a continuación, selecciona el tipo de acceso que te gustaría asignarle mediante el cuadro desplegable:
Acceso completo: Pueden editar y compartir la página.
Puede editar: Pueden editar el contenido de la página, pero no pueden compartirla. (Esta opción solo está disponible en planes de pago.)
Puede comentar: Solo pueden leer y comentar, no editar ni compartir.
Puede ver: Solo pueden leer el contenido, pero no compartirlo.
Eliminar: Revoca el acceso a la página.
Una vez se añada un grupo, aparecerá en el menú
Compartiry podrás ajustar el nivel de acceso en el cuadro desplegable.Puedes dar a distintos grupos niveles de acceso diferentes para la misma página.
Los permisos asignados en cualquier página se aplican a todas sus subpáginas.
Compartir un espacio de equipo con grupos
Los espacios de equipo son un área dedicada a cada equipo dentro de tu organización o empresa y cada uno de ellos se puede personalizar por separado. Más información sobre los espacios de equipo →
Para compartir un espacio de equipo con grupos de tu espacio de trabajo:
Desplaza el cursor sobre el nombre del espacio de equipo en la barra lateral.
Haz clic en el botón
•••y luego ve aConfiguración del espacio de equipo.Desde aquí, podrás buscar y añadir grupos al espacio de equipo.
Menciona a un conjunto de usuarios en una página escribiendo
@seguido del nombre del grupo.Si tienes una propiedad de persona en una base de datos, puedes mencionar un grupo en esa propiedad. Asimismo, puedes modificar la configuración de la propiedad para que los grupos reciban una notificación cuando se los mencione en ella. Descubre más sobre esta opción aquí →
Preguntas frecuentes
¿Cómo se pueden utilizar grupos en lugar de varios espacios de trabajo independientes?
¿Cómo se pueden utilizar grupos en lugar de varios espacios de trabajo independientes?
Sabemos que hay personas que, para establecer permisos pormenorizados, crean varios espacios de trabajo en lugar de varios grupos. Por ejemplo, crean espacios de trabajo independientes para Diseño, Marketing, Dirección, etc., de manera que el personal de cada departamento no pueda acceder al trabajo de los demás, ni editarlo o distraerse con él. Hay una forma rápida de hacer eso mismo, pero utilizando los grupos:
Desactiva
Acceso al espacio de trabajo. De esta forma las personas y grupos no verán las páginas a menos que se les haya concedido acceso específicamente.En cada página, concede distintos niveles de acceso por grupo. Estos niveles de acceso se aplicarán a todas las subpáginas de dicha página.
Así, por ejemplo, puedes tener una sección del espacio de trabajo únicamente para el equipo de programación. Crea un grupo con todos los programadores y, a continuación, en la página de nivel superior del equipo de programación, activa
Acceso completosolo para ese grupo. Puedes anidar páginas dentro de dicha página de nivel superior y solo el equipo de programación tendrá acceso a ellas.
Who can manage groups in my workspace?
Who can manage groups in my workspace?
Workspace owners and membership admins can create and manage all groups.
Group owners can manage membership, group owners and rename the groups they own.
Can I restrict who can create groups?
Can I restrict who can create groups?
On Enterprise plans, workspace owners can restrict group creation to workspace owners and membership admins only.
