Todo lo que necesitas saber sobre la configuración y gestión de una organización en Notion
Mejora la forma en que gestionas tu empresa gracias a los niveles de control de la organización en Notion. Descubre cómo modificar la configuración y los permisos de forma eficaz para toda la organización en un solo lugar, desde donde podrás gestionar los usuarios, los permisos y los ajustes de seguridad. Aquí tienes, por fin, una forma optimizada de garantizar la seguridad y sincronización de todo el conjunto.
A medida que tu equipo crece en Notion, gestionar varios espacios de trabajo y configuraciones no debería ralentizar tu ritmo. Si distintos administradores gestionan distintos espacios de trabajo, lograr que todos estén en sintonía puede convertirse en un laberinto administrativo. Sin una visión panorámica, podrías desperdiciar tiempo valioso intentando desenredar configuraciones confusas en lugar de centrarte en tareas más estratégicas.
Los controles a nivel de organización de Notion unifican todo lo que necesitas en un solo lugar, desde las personas hasta la configuración de seguridad y mucho más. Como propietario de una organización, tendrás una Consola de administración ordenada e intuitiva que se encuentra fuera del producto principal. Esto te otorga visibilidad y control total sobre la configuración de toda la empresa en todos tus espacios de trabajo. Imagínatelo como tu centro de mando: una única fuente de información donde puedes ver todo lo que sucede y hacer ajustes con solo unos pocos clics.
Con esta guía aprenderás lo siguiente:
Configurar tu organización y asignar propietarios de la organización para centralizar la gestión de ajustes.
Comprender las diferencias entre los propietarios de la organización y los propietarios del espacio de trabajo.
Usar la consola de admin para obtener una vista general de todo lo que sucede en tus espacios de trabajo.
Utilizar los ajustes recomendados de Notion para garantizar la máxima seguridad de tu organización.
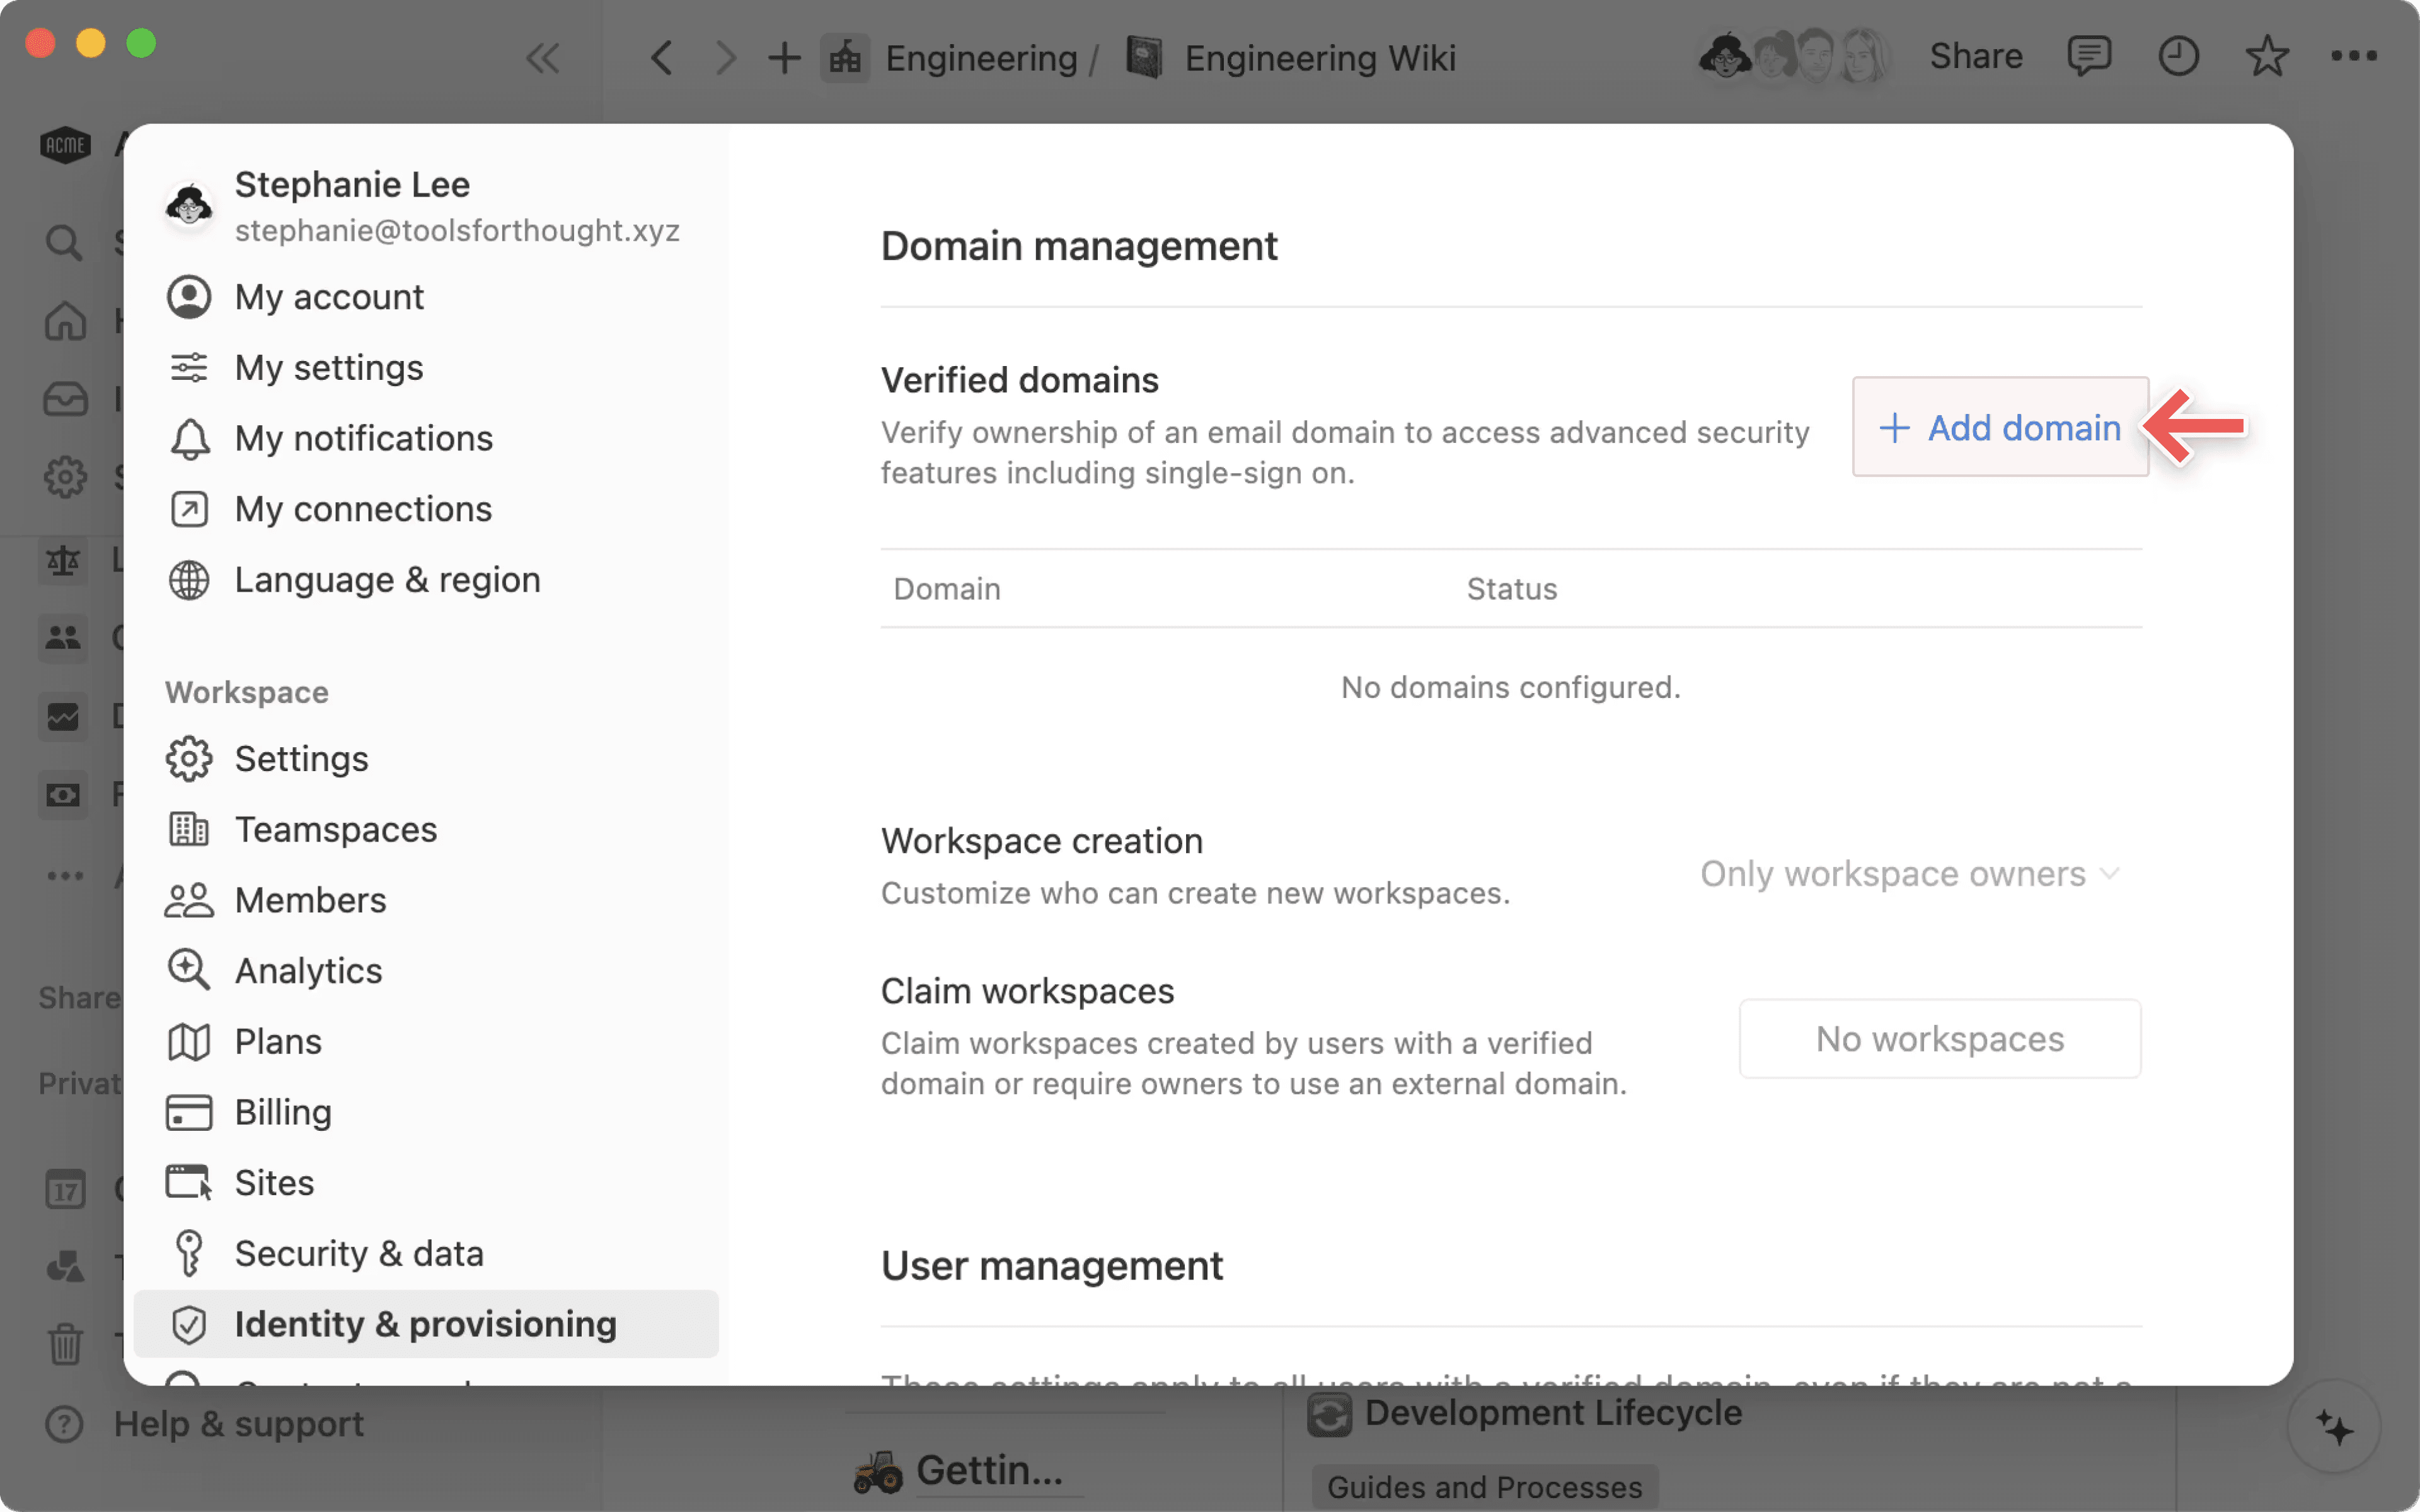
Cuando configuras una organización en Notion, reclamar el dominio de tu empresa te da más control y visibilidad sobre cualquier persona o espacio afiliado a ese dominio en Notion. La verificación del dominio es el primer paso para gestionar los niveles de control de toda la organización. Habilita capacidades administrativas y de seguridad esenciales, incluida la unificación de múltiples espacios de trabajo asociados con tu dominio en tu organización. También tendrás acceso a los ajustes para gestionar el dominio. Entre otras cosas, podrás configurar el Inicio de sesión único de SAML o SSO de SAML para tu espacio de trabajo, usar integraciones con Notion mediante vistas previas de enlaces y decidir quién puede crear espacios de trabajo. Consulta este artículo para obtener más información.
Una vez que hayas reclamado el dominio de tu empresa, puedes asignar propietarios de la organización para que gestionen los controles y la configuración de toda la empresa.
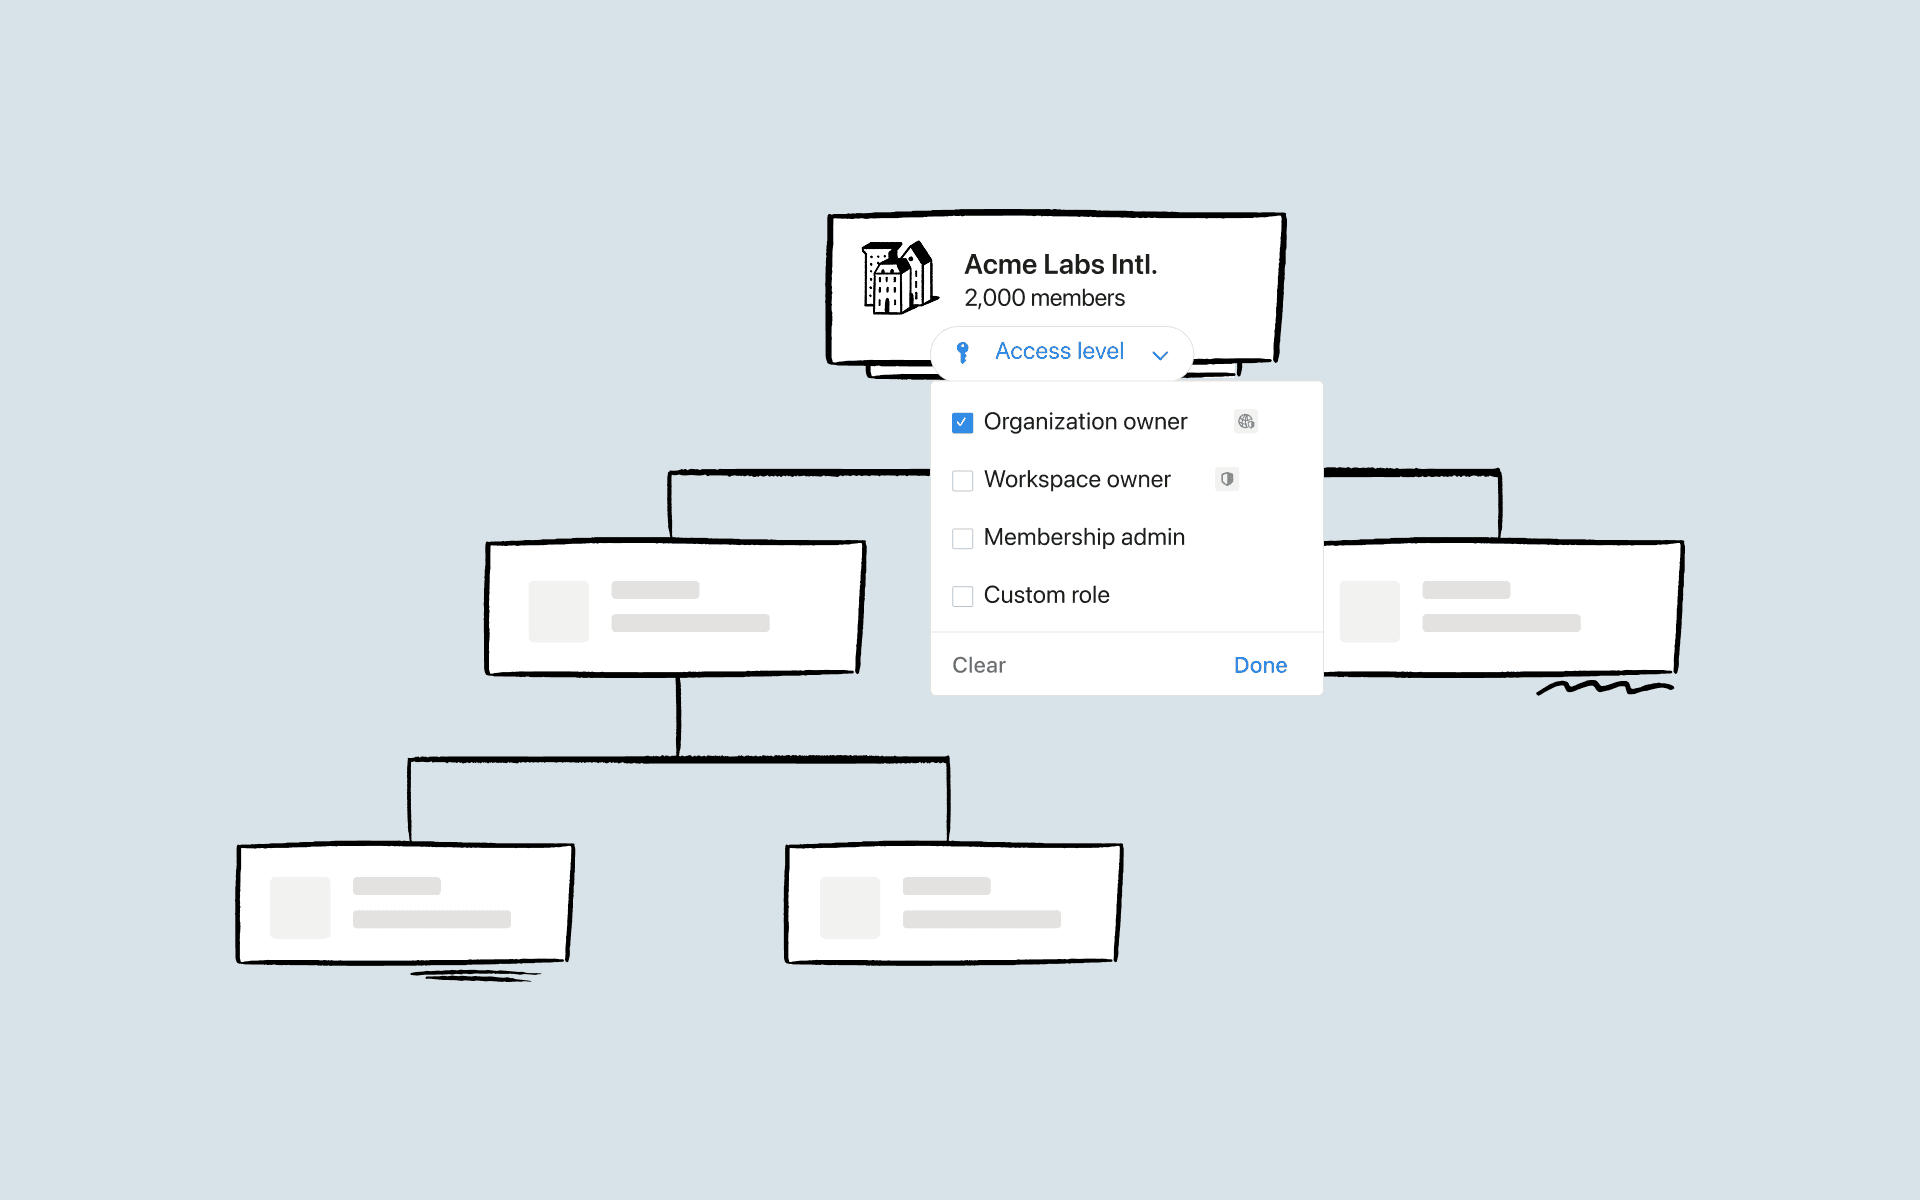
Piensa en los propietarios de la organización como superadministradores que tienen control total sobre los permisos y la configuración de toda la empresa, incluidos los espacios de trabajo de los que no forman parte. Para garantizar que todo funcione de manera eficiente, también supervisan a otros administradores, como los propietarios de espacios de trabajo y de equipos. Consulta nuestro artículo de referencia para obtener más información sobre cómo configurar los propietarios de la organización.
Por ejemplo, si tu empresa tiene espacios de trabajo distribuidos en América del Norte, Europa y Asia, la actualización de las configuraciones de seguridad básicas, como las políticas de contraseñas, requiere iniciar sesión en cada espacio por separado. Sin los permisos adecuados, tendrás que pedirle a otros propietarios de los espacios de trabajo que realicen cambios, incluso los más simples. En cambio, tener propietarios de la organización al mando es lo más óptimo para que las cosas funcionen bien y sin problemas.
Puedes tener varios propietarios de la organización, pero es importante establecer pautas claras para trabajar en conjunto. Esto ayuda a mantener la sincronización entre todos a la hora de administrar configuraciones y permisos.
Con múltiples roles en juego, es importante comprender las diferencias clave entre los propietarios de la organización y los propietarios del espacio de trabajo:
Los propietarios de la organización son superadministradores y cuentan con el máximo nivel de control. Tienen autoridad sobre los permisos y la configuración de toda la empresa, incluidos los espacios de trabajo que no gestionan directamente.
Los propietarios de los espacios de trabajo gestionan sus espacios específicos con privilegios de administrador, pero tienen ciertas limitaciones cuando este forma parte de una organización. La configuración del propietario de la organización puede restringir algunos de sus controles.

Recomendamos que los propietarios de la organización sean los principales responsables de tomar decisiones sobre las políticas y la configuración de toda la empresa. Para ayudarlos a trabajar sin problemas con los propietarios de los espacios de trabajo, estas son algunas prácticas útiles:
Documenta los marcos de decisión: redacta pautas claras y sencillas sobre qué decisiones puede tomar cada administrador según su nivel. Esto ayuda a evitar confusiones.
Configura canales de comentarios: crea formas sencillas para que los propietarios de espacios de trabajo compartan sus opiniones sobre las políticas y las decisiones que afectan a sus equipos.
Simplifica los cambios: establece un proceso claro para que los propietarios de espacios de trabajo puedan solicitar cambios en los ajustes cuando lo necesiten.
Mantén a todos informados: informa a los propietarios de los espacios de trabajo con anticipación sobre cualquier cambio que pueda afectar sus espacios de trabajo.
Si bien los controles a nivel de organización ayudan a mantener todo seguro y funcionando sin problemas, no deben interferir con la configuración específica del espacio de trabajo. Si sigues estas prácticas, podrás mantener la seguridad y, al mismo tiempo, ofrecer a los propietarios de los espacios de trabajo la flexibilidad que necesitan para gestionar sus equipos de manera efectiva.
Cuando asumes el rol de propietario de la organización, la consola de administración funciona como tu panel de control, brindándote una vista general de tu equipo, la configuración de uso compartido, los controles de seguridad y cumplimiento y los registros de auditoría, todo en una ubicación centralizada.
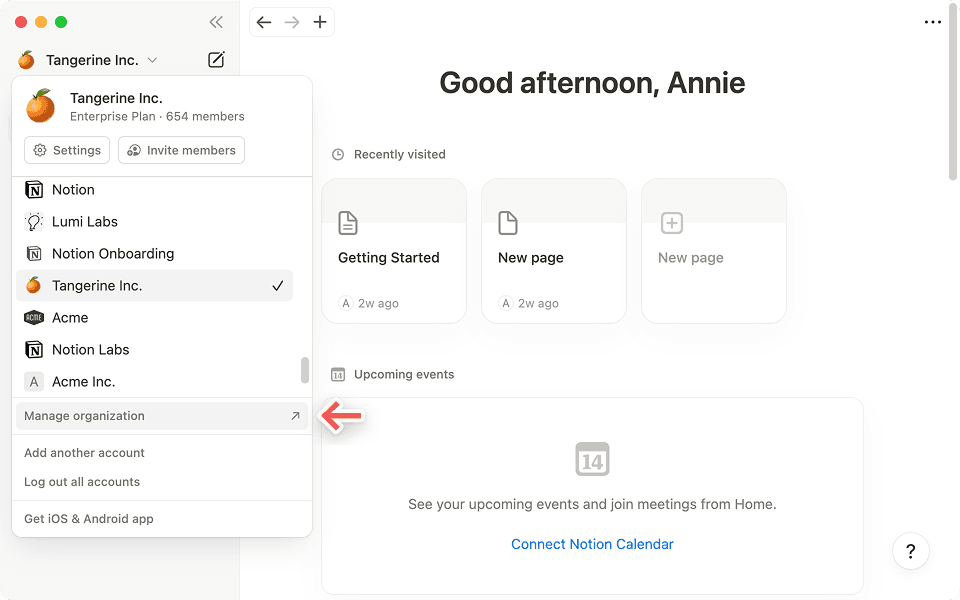
Para acceder a la consola de administración, abre el selector de espacios de trabajo y selecciona Gestionar organización.
La pantalla de inicio te permite explorar cinco categorías clave: General, Personas, Seguridad, Datos y permisosy Estadísticas. A continuación, te explicamos cómo puedes aprovechar cada configuración al máximo:
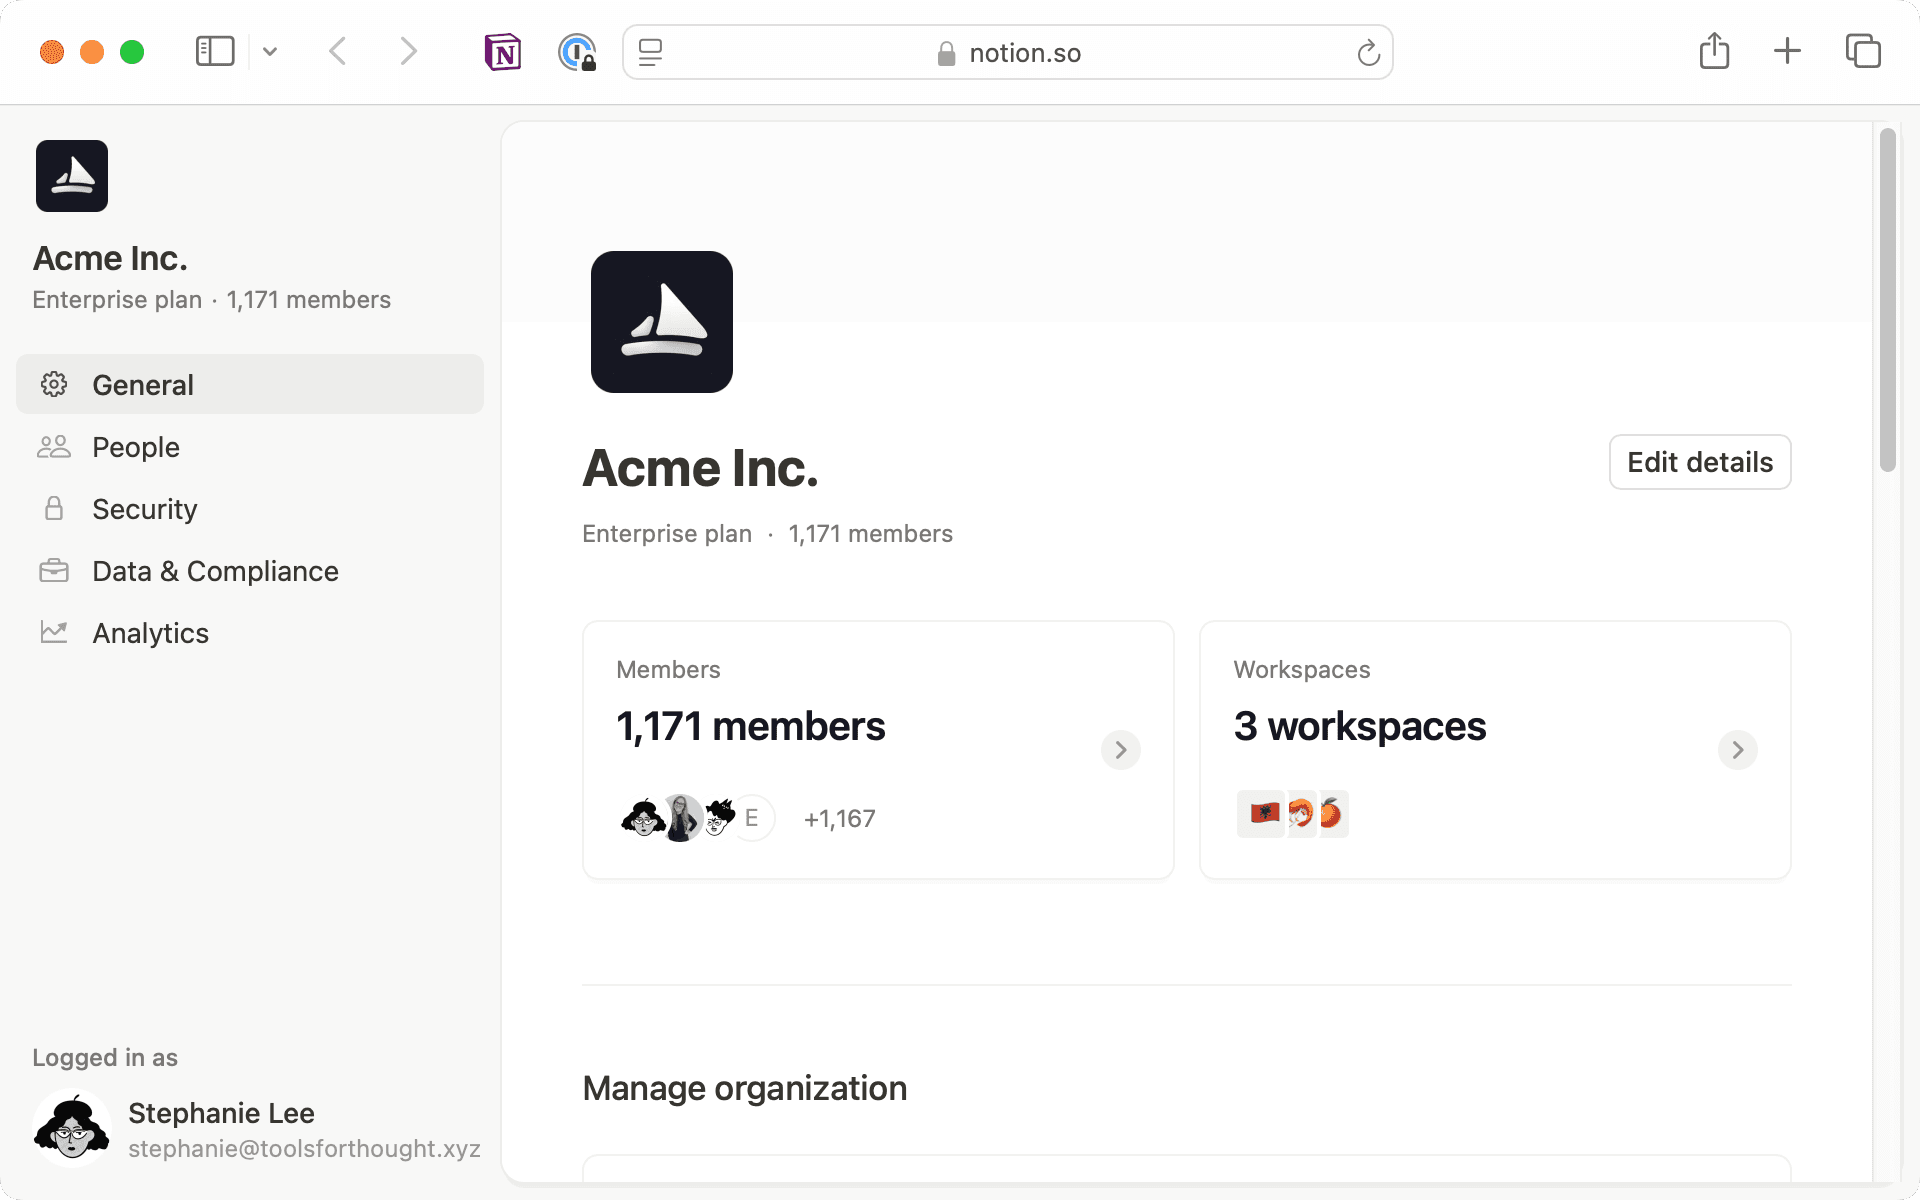
1. Configuración general
La pestaña General te ofrece acceso rápido a la configuración clave de la organización. Puedes editar el nombre de tu organización, el avatar, los dominios de correo electrónico verificados, los espacios de trabajo y de equipo, administrar el Inicio de sesión único de SAML o SSO de SAML y gestionar el aprovisionamiento de SCIM, todo desde una ubicación central.
En esta pestaña, cuando selecciones Gestionar espacios de trabajo, verás todos los espacios de trabajo conectados a tu organización. Haz clic en cualquier espacio de trabajo para visualizar y ajustar las funciones activadas. Por ejemplo, puedes activar la IA de Notion para equipos específicos mientras la mantienes desactivada para otros. ¿Sabes qué es lo mejor de todo? Puedes administrar toda la configuración desde una vista unificada, sin tener que cambiar de un espacio de trabajo a otro.

Configuración general recomendada por Notion
Estos son los ajustes que recomendamos en función de las necesidades más comunes de las organizaciones:
Activa la opción Habilitar el inicio de sesión único (SSO): el SSO ayuda a los admins de TI a optimizar el acceso de los usuarios en todos los sistemas y ofrece a los usuarios finales un punto de acceso único que no plantea complicaciones.
Establece tu método de inicio de sesión como
Solo Inicio de sesión único de SAML o SSO de SAML: de ese modo, SAML será el único método de inicio de sesión, lo que simplificará la experiencia tanto para los usuarios finales como para los admins de TI. Podrás configurar el Inicio de sesión único de SAML o SSO de SAML a nivel de organización, pero ten en cuenta que, en este momento, solo podemos admitir un proveedor de identidades (IDP) por organización, por lo que todos tus espacios de trabajo deben estar en el mismo IDP.Desactiva la
Creación automática de cuentas: así evitarás que los nuevos usuarios creen automáticamente cuentas de Notion a través del inicio de sesión único (SSO), lo cual vendrá de maravilla para implementar Notion por fases.Activa la opción
Suprimir correos electrónicos de invitación del aprovisionamiento SCIM: esto te da control sobre cómo se comunica internamente el lanzamiento de Notion y evita que se envíen correos automáticos cuando aún no estés listo para anunciarlo.
2. Configuración de Personas
La pestaña Personas te permite administrar con facilidad cómo aparecen y funcionan los miembros y los invitados dentro de tu organización. Esto incluye la gestión de sesiones de usuario y configuraciones de acceso a la cuenta, como el restablecimiento de contraseñas y la capacidad de cerrar la sesión para todos los usuarios. Consulta nuestro artículo de referencia para obtener más información sobre las configuraciones disponibles.
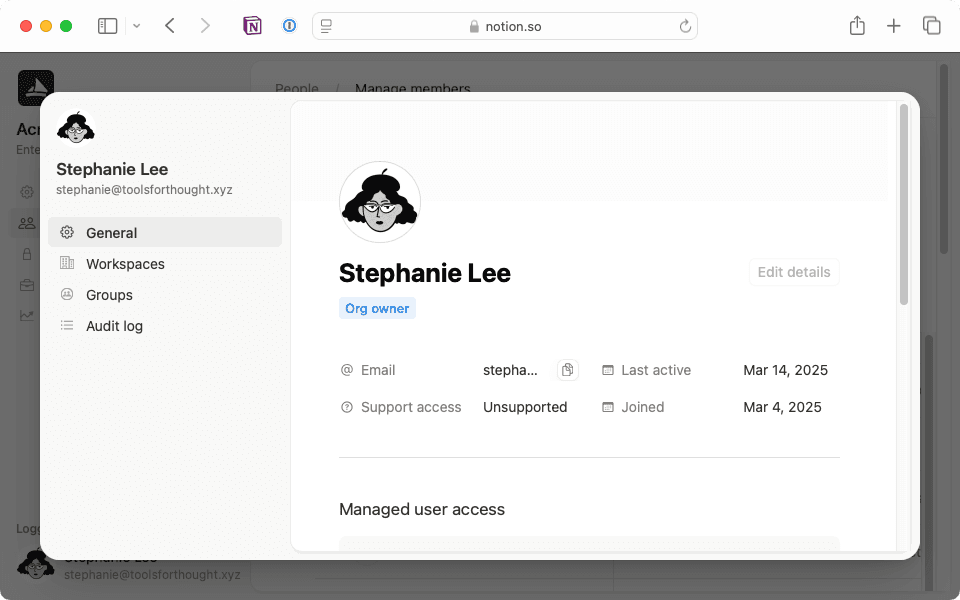
La sección Gestionar miembros te permite ver a todos los miembros de tu organización y los espacios de trabajo a los que pertenecen. Esta vista es de gran utilidad para hacer un seguimiento de tus miembros y administrar la facturación. En vez de tener que exportar listas de miembros de cada espacio de trabajo y eliminar de forma manual los duplicados, puedes ver todo en un solo lugar. De esa manera, si un usuario pertenece a varios espacios de trabajo, puedes tener la seguridad de que solo se contabilizará una vez en un ciclo de facturación determinado.
También puedes hacer clic en cualquier miembro para ver su perfil en todos los espacios de trabajo a la vez para evitar tener que recopilar su información de diferentes lugares.

Configura los ajustes de los invitados a gran escala
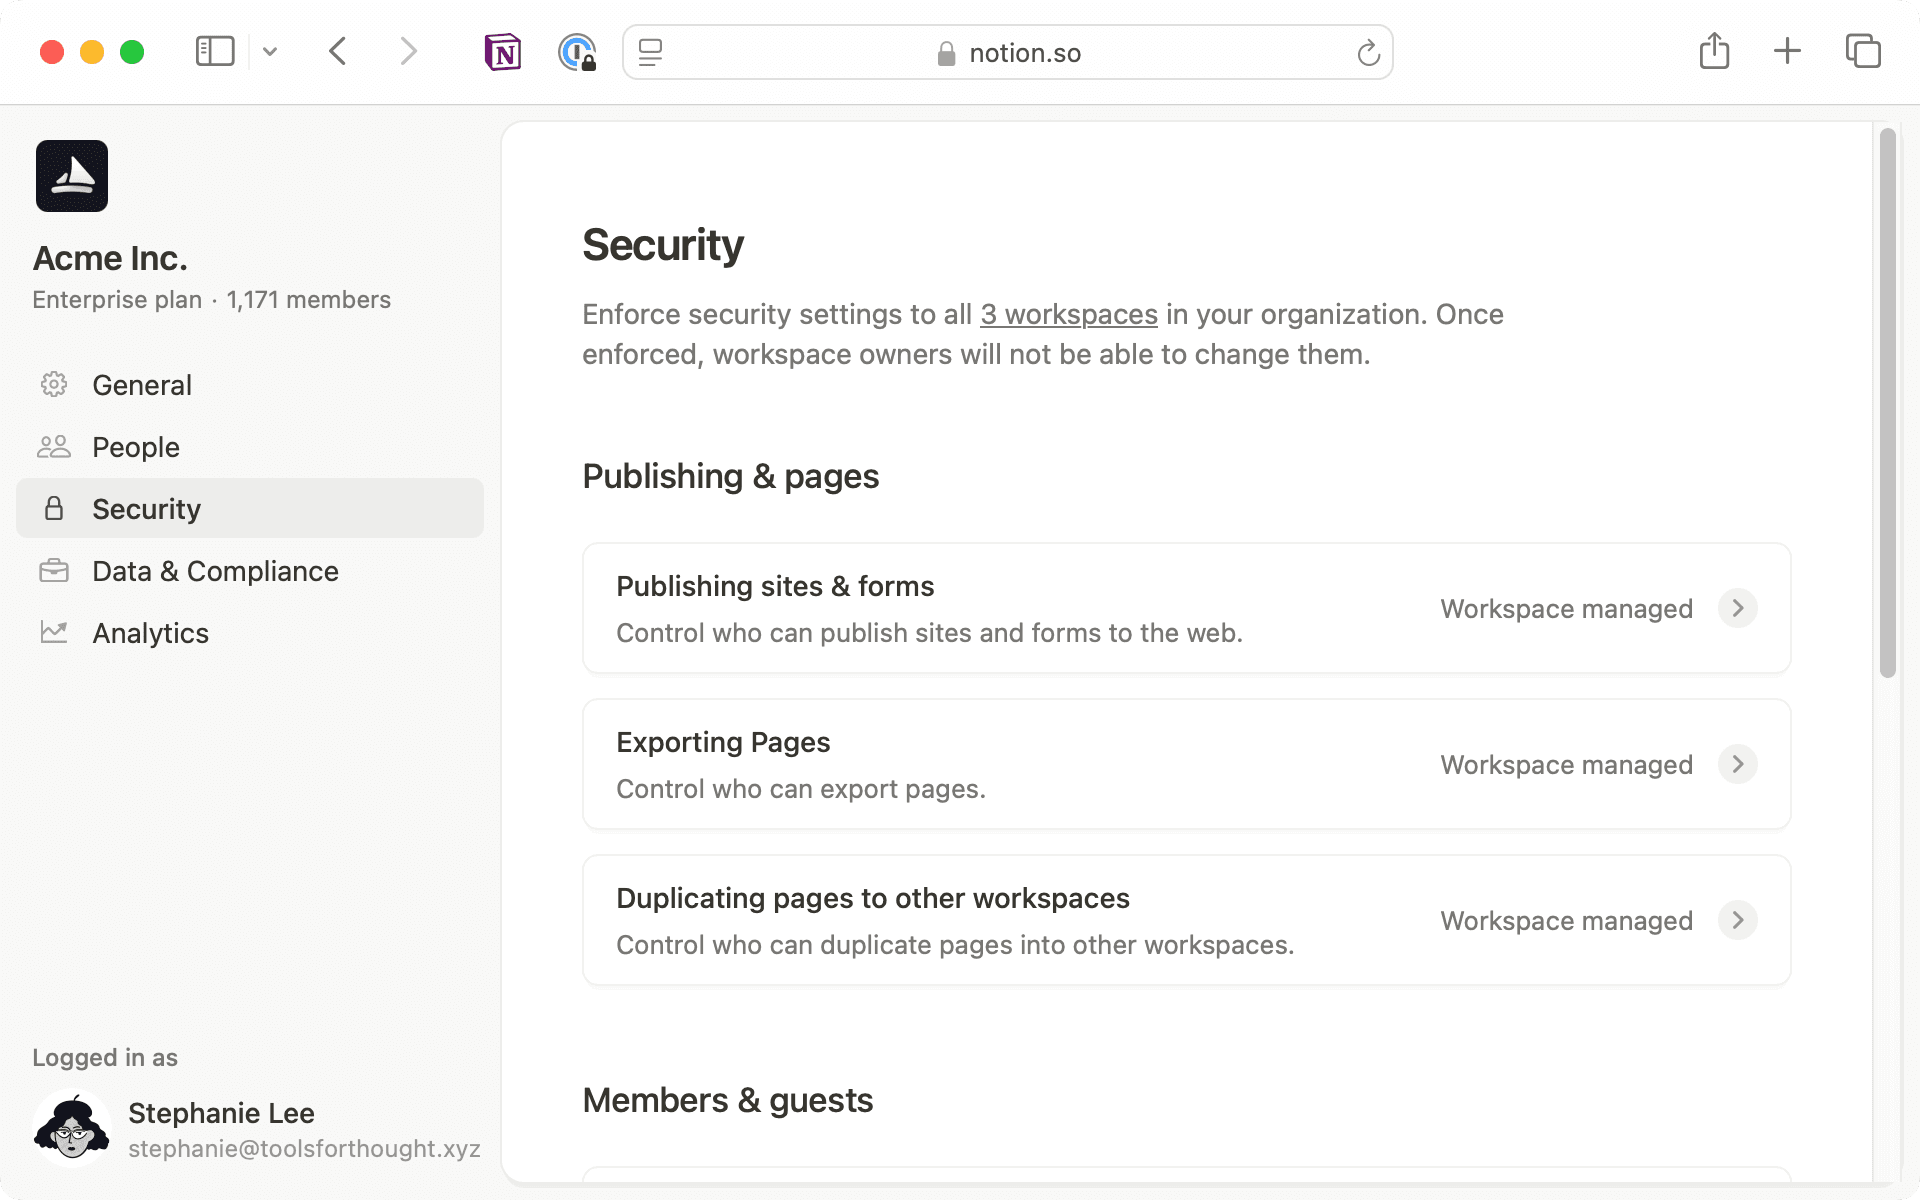
3. Configuración de Seguridad
La pestaña Seguridad te ayuda a proteger la información de tus equipos. Podrás configurar y gestionar los ajustes de seguridad en todos tus espacios de trabajo, como controlar quién puede compartir contenido externamente, exportar páginas o agregar nuevos miembros al equipo. También puedes decidir qué aplicaciones e integraciones puede conectar tu equipo para no comprometer la seguridad.
Coordínate con los propietarios de los espacios de trabajo
La consola de administración te permite establecer ajustes para toda la organización en bloque, que se propagan automáticamente. También puedes designar que algunos ajustes los gestione el espacio de trabajo, gracias a lo cual podrás comprobar claramente qué configuraciones se han aplicado y dónde.
Supongamos que uno de tus espacios de trabajo, Sardinas S. A., contiene información altamente confidencial. Tu intención es evitar que los miembros publiquen sitios y formularios por error. En este caso:
Dirígete a la fila del espacio de trabajo de Sardinas S. A. donde dice
Habilitar para todosy cámbiala aDeshabilitar para todos.Al hacerlo, aparecerá la opción
Aplicación masiva. Haz clic en ella para aplicar automáticamente la configuración a todos los espacios de equipo asociados a este espacio de trabajo.Cuando hayas terminado, haz clic en
Guardar cambiosen la esquina superior derecha de la página.
Cuando hagas cambios en bloque, se aplicarán de inmediato en todos los ajustes de la unidad. Por ejemplo, si aplicas la configuración en bloque a un espacio de trabajo, también se hará efectiva en todos los espacios de equipo que contenga. Recuerda que más adelante podrás modificar los ajustes específicos de cada espacio de equipo.
Configura los ajustes de seguridad y datos de toda la organización
Activa la opción Desactivar la publicación de sitios y formularios: de ese modo, protegerás tu espacio de trabajo, ya que solo permitirás la publicación de estos elementos a espacios de equipo específicos cuando sea necesario. Solo los usuarios que son propietarios de espacios de trabajo y de espacios de equipo pueden habilitar la publicación en su espacio de equipo.
Activa la opción
Deshabilitar la duplicación de páginas: tu contenido estará más seguro al evitar que los miembros copien páginas a otros espacios de trabajo.Habilita la opción
Desactivar exportación: te sugerimos mantener la opción desactivada en todo el espacio de trabajo y habilitarla solo en los espacios de equipo que la necesiten. Los propietarios de espacios de equipo que también son propietarios de espacios de trabajo pueden habilitar esto cuando sea necesario.Activa
Permitir solicitudes de invitación: si bien los miembros no pueden agregar invitados directamente, pueden solicitar que se agreguen. Esto te permite revisar quién tiene acceso a qué contenido.Activa
Permitir solicitudes de invitación de miembros: permite que los miembros soliciten agregar nuevas personas al espacio de trabajo. Puedes revisar estas solicitudes en la sección Miembros.Desactiva la opción
Permitir solicitudes para ser miembro: te recomendamos usar SSO para todo lo relacionado con la gestión de los usuarios, ya que da mejores resultados que pedirles que envíen solicitudes para unirse.
Te aconsejamos que primero desactives ajustes como la publicación de sitios y formularios a nivel del espacio de trabajo. Ten en cuenta que podrás conceder estos permisos a espacios de equipo específicos cuando haga falta. De ese modo, encontrarás el equilibrio entre seguridad y flexibilidad.
4. Configuración de Datos y cumplimiento
La pestaña Datos y cumplimiento permite a los propietarios de la organización acceder a herramientas para la búsqueda de contenido y los registros de auditoría con el fin de garantizar la gobernanza de datos y cumplir con los requisitos reglamentarios.
El registro de auditoría es especialmente útil para comprender en una única vista las acciones que se llevaron a cabo tanto en la organización como en el espacio de trabajo. Por ejemplo, si necesitas hacer un seguimiento de los cambios de configuración del espacio de trabajo a lo largo de un período de tiempo, el registro de auditoría te proporciona una línea de tiempo con las fechas y los usuarios que los llevaron a cabo.
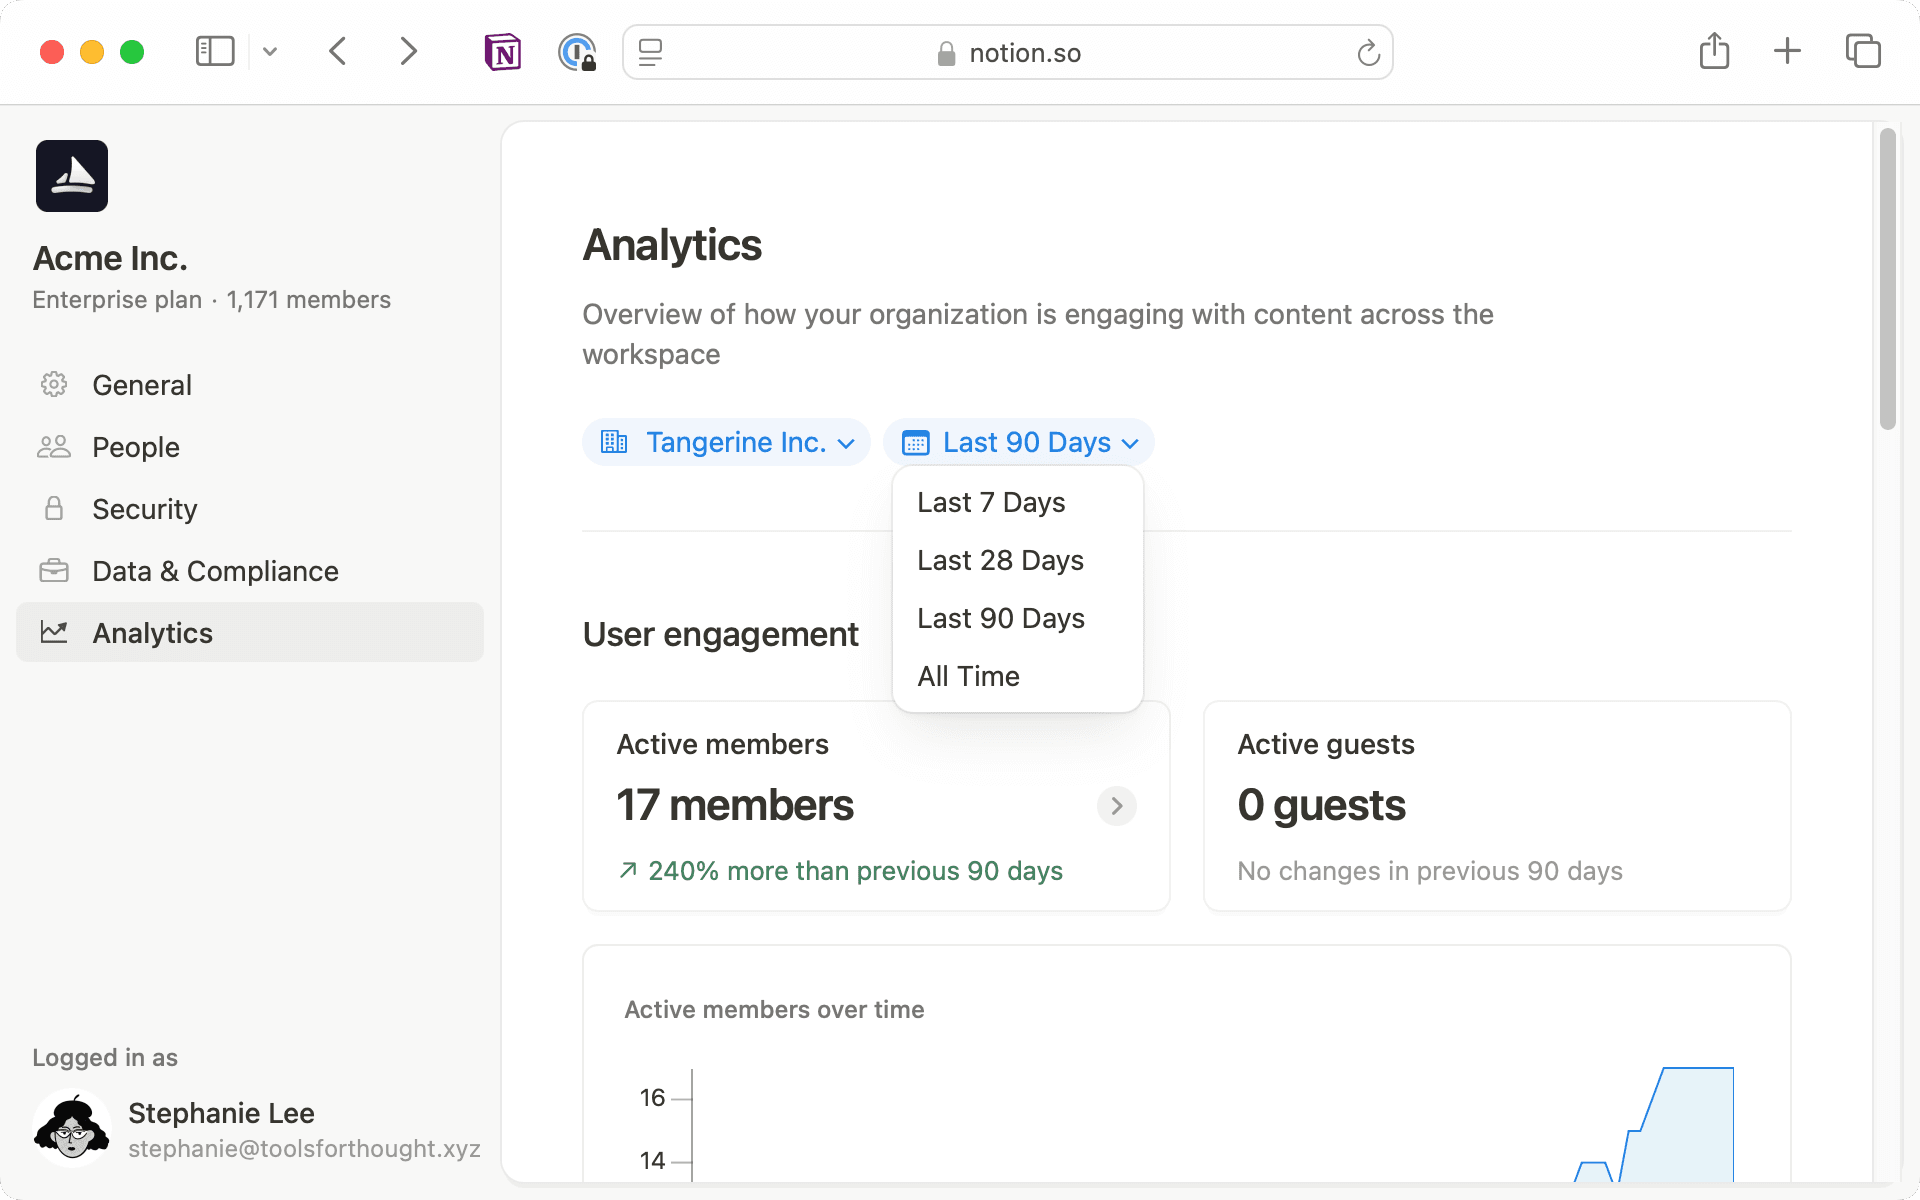
5. Configuración de Estadísticas
La pestaña Estadísticas te ayuda a entender cómo usa Notion tu equipo. Encontrarás métricas útiles, como las interacciones de los usuarios, que te ofrecen información clara sobre los miembros activos y los invitados. Así te resultará muy fácil saber cómo utilizan Notion los diferentes equipos, monitorizar la adopción y controlar el acceso de los invitados.
También puedes consultar estadísticas detalladas acerca de cómo interactúan las personas con el contenido en todos tus espacios de trabajo.
Activa la opciónLimitar la creación de espacios de equipo solo a los propietarios de espacios de trabajo : establece que solo los propietarios de espacios de trabajo puedan crear espacios de equipo para tenerlo todo organizado. De esta forma evitarás que se creen más espacios de equipo de la cuenta y podrás mantener una estructura más clara.
Activa la opción
Guardar y mostrar las estadísticas de las visitas a páginas: descubre cómo tu equipo utiliza Notion en el espacio de trabajo. Todos pueden consultar las estadísticas de las páginas a las que tienen acceso y así entender qué está funcionando bien y qué no.Elimina todos los dominios de correo electrónico permitidos: mantén tu espacio de trabajo seguro gestionando el acceso únicamente a través de SSO. Te recomendamos que configures SSO como tu único método de inicio de sesión para que puedas controlar quién se une a través de tu proveedor de identidades. Algo muy útil si planeas implementar Notion en tu equipo paso a paso.

Recursos adicionales para las herramientas de administración Enterprise
En su esencia, una buena gestión organizacional consiste en encontrar el equilibrio adecuado entre seguridad, flexibilidad y facilidad de uso. Nuestra consola de administración reúne todas tus configuraciones en un solo lugar, por lo que te será más fácil mantener este equilibrio. Esto significa que puedes mantener tu espacio de trabajo seguro y bajo control mientras sigues garantizando facilidad y eficiencia para tu equipo.
¿Hay algo que no hayamos abordado?