How to build a data agent in Notion
Learn how to build a data agent in Notion by connecting Snowflake to a Custom Agent or your Notion Agent. Give it the right access, context, and instructions to answer your team’s data questions reliably.
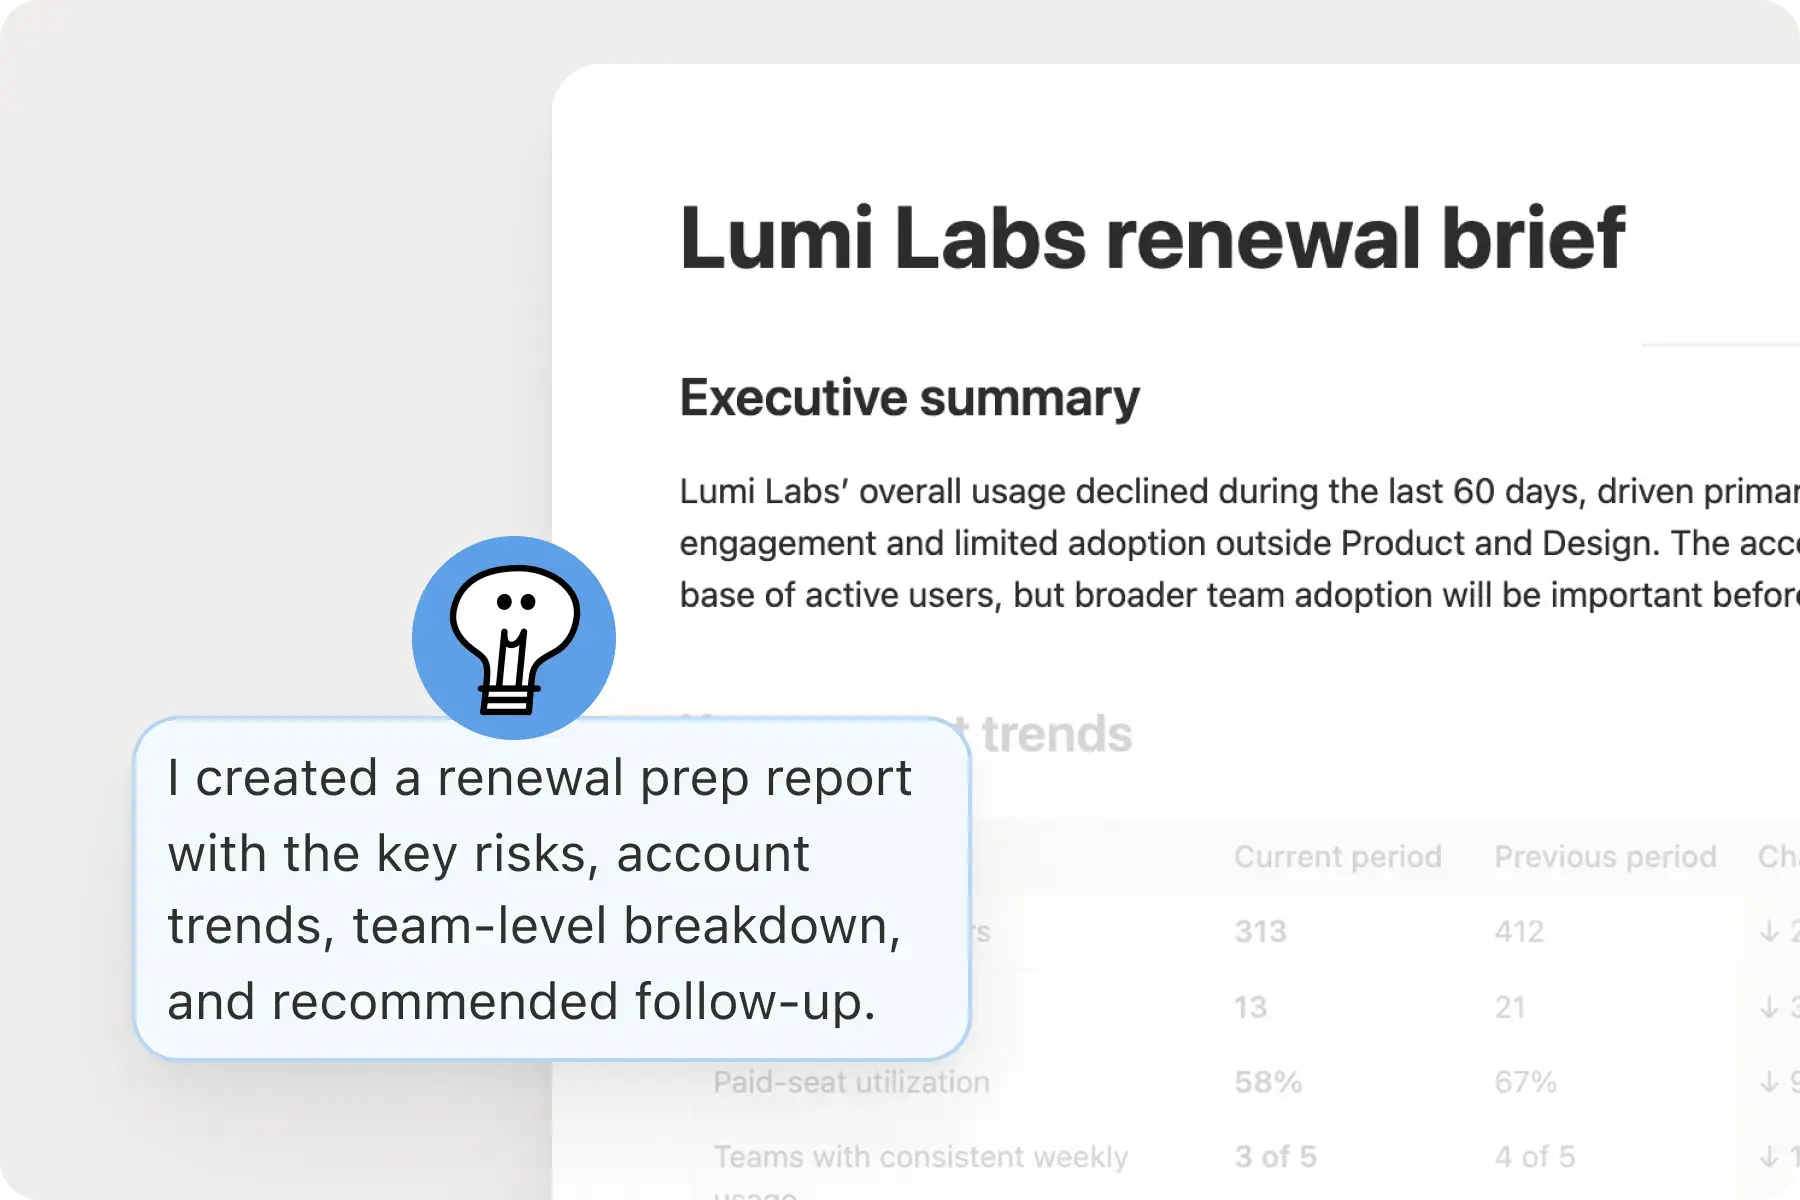

Some features are in alpha and may not be available yet
Some features covered in this guide, including workspace-configured MCP connections and per-user authorization in Custom Agents, are currently in alpha and may not be available in your workspace yet.
To request access, contact your Notion account team or apply to our early access program for data agents.
A data agent works best when it can access the right data, understand the context around it, and follow clear guidance for how to answer.
In this guide, you’ll build a data agent in Notion using a workflow you can adapt to your team’s tools and questions. You’ll learn how to connect your agent to Snowflake, give it the right context and instructions, and review its answers over time. We’ll use a Custom Agent with per-user authorization, then show you how to maintain context and review logs to help keep answers accurate.
For more background on how we've approached this at Notion, see our blog post.
Snowflake setup requirements
This guide assumes your workspace admin has already configured the Snowflake MCP server and connected it to either a Custom Agent or your Notion Agent.
Once that’s in place, you can sign in with your own Snowflake credentials. The agent will only be able to access data your Snowflake account already has permission to see.
For admin instructions on how to set up Snowflake MCP, see our help doc.
As you design your data agent, focus on what will make it reliable. Use these three areas to guide your setup:
Governed access defines what data and tools your agent can access.
Shared context gives your agent the knowledge it needs to understand your business and interpret data correctly.
Clear instructions define how your agent should work when it handles a request.
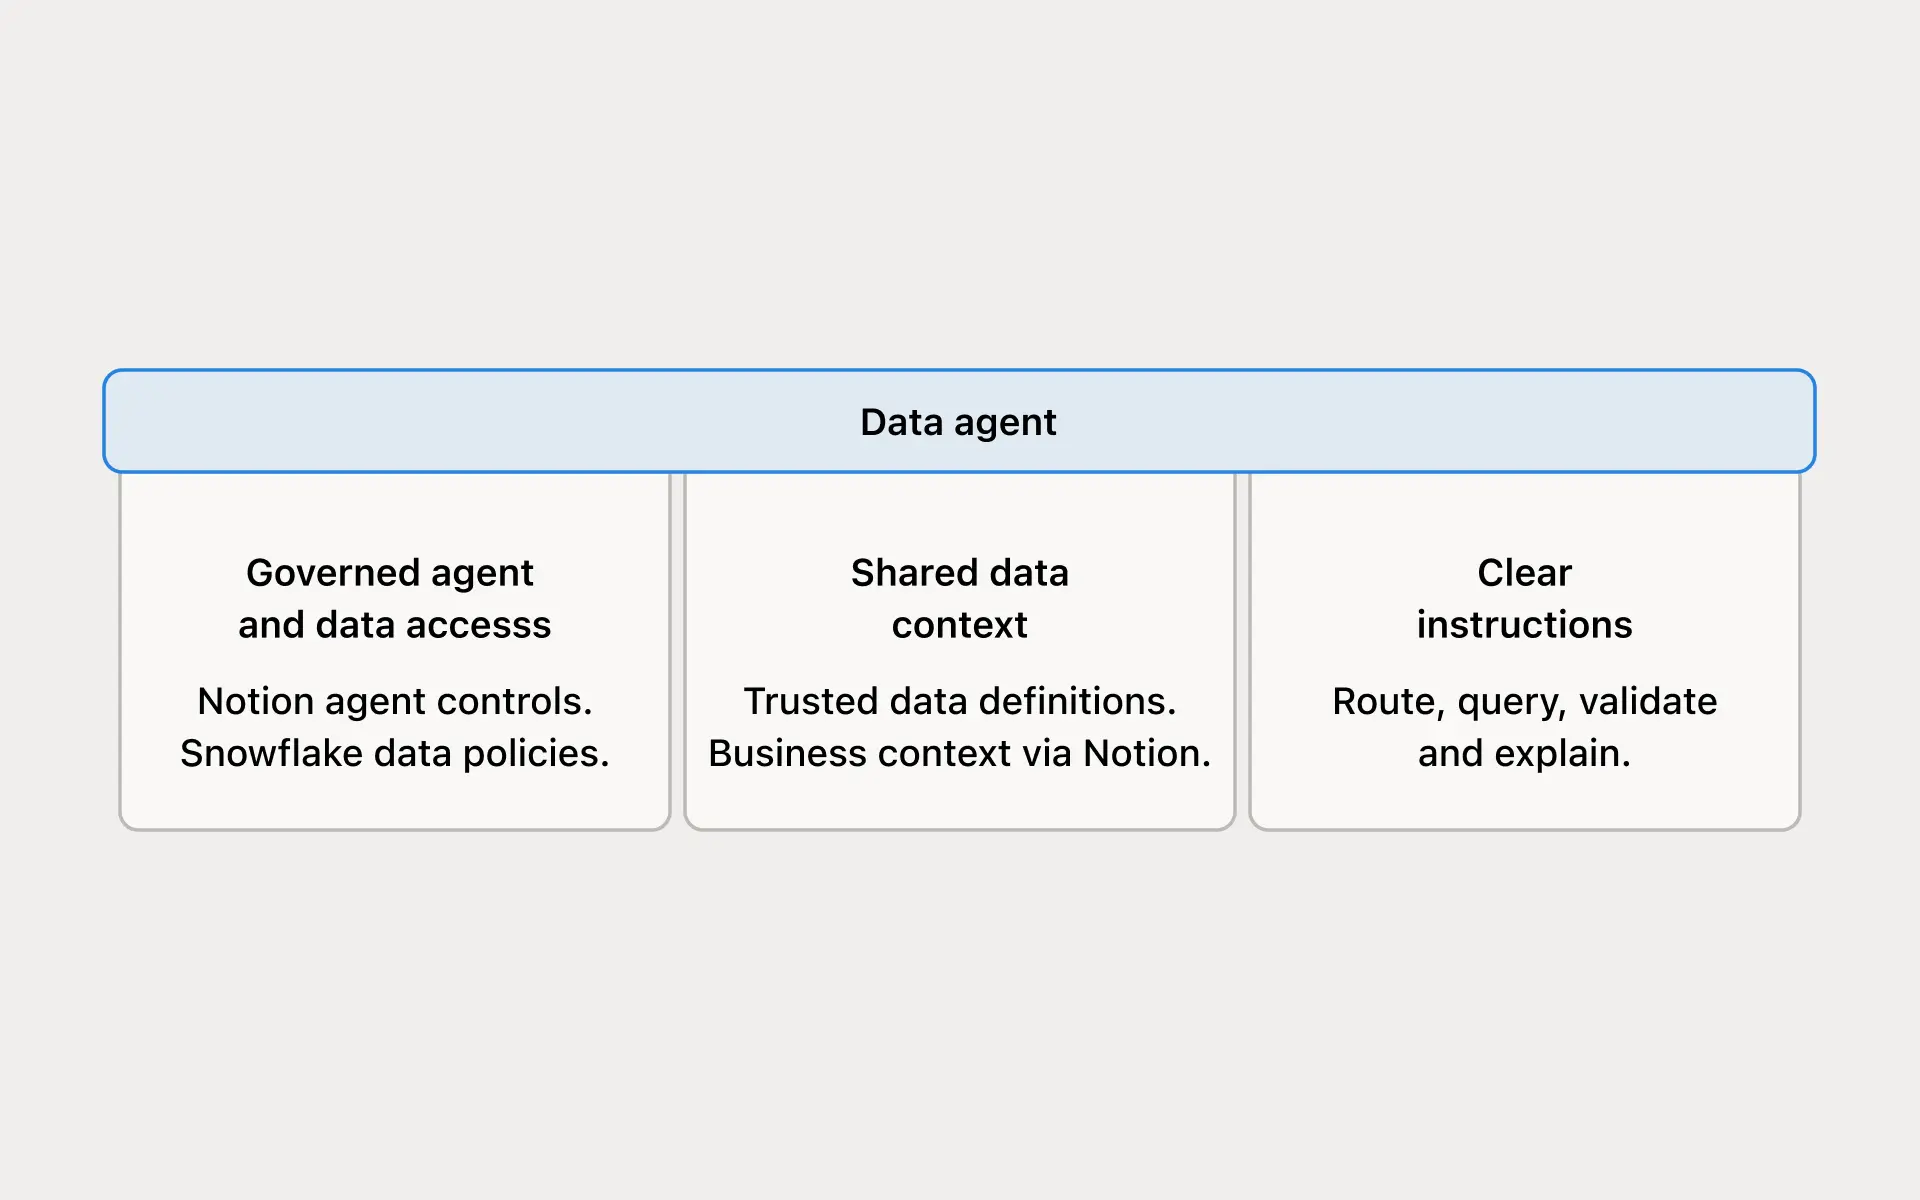
These components may live across different tools. Governed access is usually managed through your data platform and its connection to Notion. Shared context can live in Notion, your data platform, or both. Clear instructions usually live in your agent configuration.
As your data and business change, reviewing query logs and checking answers can help you spot what needs to be updated.
Start by making sure your agent can only use data the person making the request already has permission to see. Here’s what to check:
Connect with your own Snowflake account: Use the approved Snowflake MCP server and sign in with OAuth using your own Snowflake credentials. Confirm that you’re using the correct Snowflake user and role. If you’re using a managed Custom Agent, each person signs in with their own Snowflake credentials the first time they use it (alpha feature). If you’re using your own Notion Agent, you only need to connect your account once.
Workspace-configured MCP connection (alpha feature): Your admin can configure the Snowflake MCP connection and OAuth application for the workspace, so end users can connect in just a few clicks and authenticate with their own Snowflake credentials.
Limit what the agent can access: Give it only the tools and datasets needed for the workflow. Also confirm who can see the agent’s output.
Test the permissions: Run a request that should work and one that should be blocked. Then revoke access and confirm the connection stops working.

Where to use this Snowflake connection
Once your agent can access the right data, it needs context to understand what that data means. Keep each type of context focused on a specific purpose:
Data context explains how your data works. It includes approved metric definitions, relationships, sources, and caveats that help your agent interpret the numbers correctly.
Business context explains the situation around the question. It can include goals, customer history, or relevant events that help your agent understand what the user is asking and interpret the result.
Routing guidance tells your agent where to look. It directs the agent to the approved data sources, connections, tools, and supporting context needed to answer the question.
Keeping these roles separate helps prevent conflicting information. Business context, for example, shouldn’t redefine a metric. Routing guidance should point to the approved source rather than introduce a new definition.
1. Choose where your data expertise lives
Start with the systems your team already trusts and maintains. Your data definitions and logic might live in documented datasets, a semantic layer, an analytics service, or across multiple tools.
If you use Snowflake as your data layer, it can hold much of the data context your agent relies on.
Semantic Views store reusable definitions for metrics, dimensions, entities, and relationships.
Cortex Analyst uses that context to answer natural-language questions with SQL. Verified examples and evaluation tools can help you refine how it responds.
Notion serves as the context layer around your data. It brings in business knowledge such as account plans, project updates, and other team context to help your agent understand the question and interpret the result.
Routing guidance connects these sources. Tell your agent where to send each type of question, what context to use, and how to check the result before responding.
2. Give your agent a clear starting point in Notion
Once you know where your data expertise and business context live, create a starting point in Notion that tells your agent where to look and how to use those sources.
Include:
Where to look: Link to relevant business knowledge, approved data definitions, and tools.
How to work: Explain how to route questions, analyze the data, validate the result, and respond.
How to improve: Name an owner and give people a place to flag corrections or suggest updates.
You can keep this guidance in a page, skill, or lightweight Notion database that your team can maintain.
For example, your starting point might link to an account plan for business context and to the approved definition of adoption wherever your team maintains that definition. When someone asks about a change in adoption, your agent knows where to find both before responding.
Best practices for maintaining your agent’s context
How we keep the context library up to date at Notion
3. How to organize business context in Notion
One way to organize business context is in a shared database. Each database row is also a page, and its properties act as metadata that helps the agent find relevant entries. The page body holds the context itself or links to the sources the agent should use.
The agent only needs to read the pages relevant to the question and follow source references from there. Metadata helps it find the right information, but it doesn’t replace the context itself. If a definition already lives somewhere else, link to the authoritative source instead of copying it.
Your database can also point to related resources, including metric definitions, schemas, or Skills. Use the example below as a starting point rather than a required structure.
3A. See how the agent finds and reads context
The agent first uses database properties to find the relevant entry, then opens that same entry to read the page body.
Example setup
Name | Domain | Card type |
|---|---|---|
Onboarding rollout | Product | Launch |
Properties like
DomainandCard typeact as metadata that helps the agent find the right entry. Opening the row reveals the page behind it.Once the agent opens the
Onboarding rolloutentry, it can read the context stored in the page body.
What to include in each context page
3B. See what belongs in the context library
Business context can capture events and decisions that help explain what was happening around the data. Here are a few examples:
Example context page | Domain | Card type | Helps answer* / Use when |
|---|---|---|---|
Onboarding checklist introduced for new workspaces | Product | Launch | Could the onboarding change help explain an activation trend? |
Enterprise pilot expanded from one team to three | Sales | Account update | Does higher usage reflect broader rollout or deeper adoption? |
Annual-plan discount offered during September | Marketing | Campaign | Could a promotion help explain a change in plan mix? |
EU sign-in disruption affected access for two hours | Operations | Incident | Could an outage help explain a short-lived usage dip? |
Team prioritized retention over new-user acquisition | Product | Decision | How should we interpret performance against current goals? |
*The Helps answer column is included here for illustration and doesn’t need to be a database property. Just make sure this guidance appears somewhere on the context page itself.
Example property setup
Start with the fields you need. Question type, Priority, and Tags are optional ways to improve retrieval as the library grows.
Property | Notion property type | Example values |
|---|---|---|
Name | Title | Onboarding rollout |
Domain | Select | Product, Sales, Marketing, Support, Operations |
Card type | Select | Plan, Decision, Launch, Account update, Campaign, FAQ, Incident |
Review status | Select | Draft, Reviewed, Outdated |
Question type | Multi-select | Adoption, Renewal prep, Trend interpretation |
Priority | Select | High, Medium, Low |
Tags | Multi-select | onboarding, rollout, seasonality |
Add more properties
3C. What you see when you open a row
The property list below shows what belongs in the page’s property area. In your database, keep those values in properties rather than repeating them in the page body. Reuse the four body headings in a database template so each new context page follows the same structure.
Example page: Onboarding rollout
Keep metric definitions, schemas, and calculation rules in the data guidance or tooling that owns them. Link to those sources when needed instead of copying them into business-context pages.
Best practices for keeping your pages and properties useful
Example skill: set up a team’s business context library
Start with one interactive workflow in a Custom Agent your team shares. Each person signs in with their own Snowflake credentials, so the agent follows their existing Snowflake role and permissions. If you’re building for yourself, you can use the same instructions in your Notion Agent.
Keep the instructions focused on what the agent needs to do consistently:
Keep the core instructions short: Aim for 200–300 words to start. Cover what the agent should do, which tools or sources to use, what to check, when to stop, and how to format the answer. Keep important safeguards even if they take you past that range.
Link to detailed guidance: Keep definitions, schemas, examples, and troubleshooting in pages or skills instead of repeating them in the main instructions.
Explain how to use each source: Tell the agent when to use a guide or data tool, what information to provide, and what to do with the result. A link by itself isn’t enough.
Be clear about what the agent can confirm: When the agent can verify an answer, include the supporting context and any important caveats. If it can’t, explain what’s missing and what it needs to continue.
Keep your linked guidance consistent so the agent can tell which sources to use and how to check its answers.
Use the templates below as a starting point. Once the first workflow is working reliably, add more question types and guidance as needed.
Use this template to build data agent instructions
Use this template to build a domain-routing skill
Context needs an owner and a review process to keep up with changes in the data and business. That process doesn’t have to use an agent.
Here’s one way to run that loop with agents:
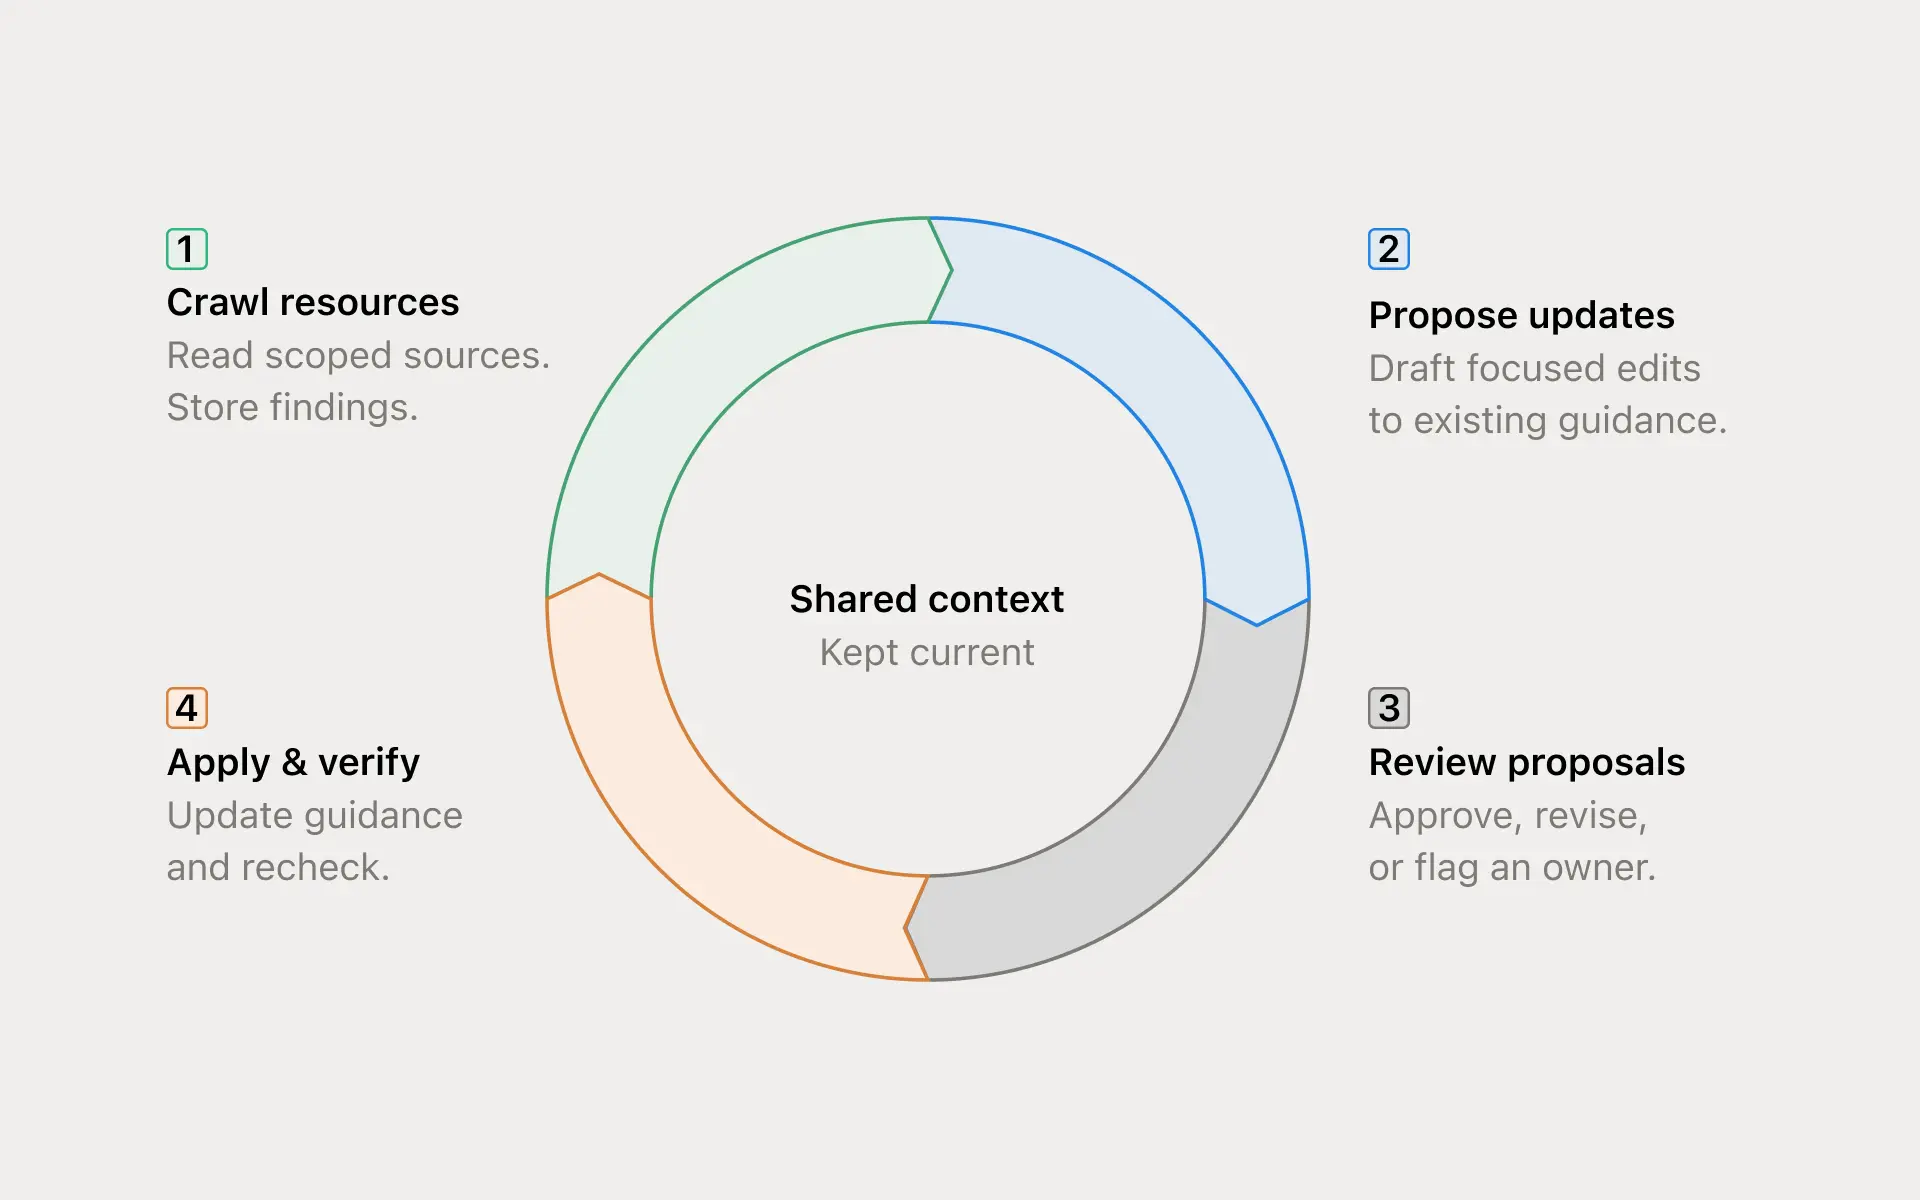
Before applying: compare with current guidance and preserve newer human edits. A merged PR alone doesn’t prove deployment or backfill.
After applying: verify the saved change and recheck affected questions. Keep unresolved proposals separate and flag anything not reviewed.
How we maintain and review our data agent system at Notion
At Notion, we use scoped Custom Agents to review activity across Slack, Notion, GitHub, and query logs. Our review process has three parts:
Nightly review: An agent checks recently created or updated context pages for formatting and convention issues. It also reviews agent conversations, query activity, relevant Slack and Notion content, and GitHub changes to identify missing, stale, or conflicting context. The agent records findings, along with supporting evidence, in a review database.
Triage: A second agent checks findings against known learnings to remove duplicates, applies small, well-supported updates when the evidence is sufficient, and escalates ambiguous or higher-risk changes for human review.
Weekly review: A Slack summary surfaces recurring patterns and findings that still need human input.
For answering questions, our instructions tell the agent to start with a narrow search by business domain and request type, expand the search only when needed, and flag gaps or conflicting information instead of guessing.
Note: The answering agent doesn’t approve or rewrite its own sources. Only explicitly pre-approved low-risk changes or owner-approved proposals move forward. Changes to metric meaning, data access, source selection, or sensitive-data handling need owner review.
For an optional Notion native example on how to review and apply context changes, click here.
Ways to run this workflow
When an answer looks wrong, you need enough evidence to trace it back to the data. Aim to identify:
Which source, metric definition, filters, and time period were used.
What query or tool execution actually ran, under which identity, and whether it succeeded.
Which business context informed the interpretation and what could not be verified.
Start with the query history or execution logs you already have, and add metadata only when you need more context. Keep sensitive logs restricted, and review answer accuracy separately from whether the query ran successfully.
Start with your existing connection
For the Snowflake path in this guide, connect directly to your approved Snowflake MCP and start with its available query history and returned execution IDs. You do not need Data Scout’s internal wrapper to begin. Snowflake’s native query history provides execution details and, for recognized agent sessions, an AGENT_TYPE classification.
This can support baseline monitoring of agent-driven query volume. Add custom metadata or an execution wrapper only when you need more detailed, question-level lineage, such as the selected metric, definition, business context, filters, or calling agent.
Level | What to do |
|---|---|
Native agent classification | Where the connection is recognized as an agent, use
to distinguish Cortex Agents, Cortex Lite Agents, qualifying external agents, and non-agent queries. Treat this as coarse usage classification, not question-level lineage. For external connections, confirm Snowflake recognizes the session through a
user or custom OAuth configured with
before relying on this field. |
Query history or execution logs | Retain returned query or execution IDs and inspect the available identity, query, status, and duration fields |
Supported execution metadata | If the tool exposes tagging or metadata arguments, pass the agreed fields with the query |
Custom execution wrapper (optional) | Have your platform team attach metadata and capture execution details server-side, preserving authorization and read-only controls |
Connecting Snowflake MCP does not install the Data Scout wrapper or automatically route queries through it. To use a wrapper across teams, your platform team needs to expose an approved execution tool and configure the relevant workflows to use it. Mentioning the wrapper in agent instructions does not add wrapper metadata to direct Snowflake calls.
Check which tools your connection actually provides. run_tagged_query is an internal Notion tool name and is not a standard feature of every data connection.
Learn how Notion adds metadata
For an optional example on how to log instructions and query Snowflake history, click here.
Use a small test set to check whether changes actually improve your agent’s answers:
Include representative questions, ambiguous cases, and failure cases with owner-validated answers or query logic.
Pin reference answers to a specific period or snapshot, or check the query logic so changing data doesn’t make your tests stale.
Run the same checks before and after changes to instructions, context, models, or tools.
Example checks before launch
Once your first use case meets your launch criteria, expand to another question family in your agent. Reuse the definitions and routing guidance you’ve already established.
Automated Snowflake reporting is a separate implementation and requires its own approved access model.
The following is an optional example of how to maintain your context library. It is separate from the Snowflake MCP and OAuth setup covered earlier.
These maintenance agents review approved sources and update Notion pages only. They don’t query Snowflake, and scheduled runs don’t inherit anyone’s Snowflake access.If you use query logs as an input, they must come from a separately approved source.
Setup example
Create a draft Custom Agent and give it read access to the selected domain pages and canonical context.
Connect the approved Slack channels and GitHub or other source tools available in your environment. Give it write access only to the review queue at first.
Start with a recurring review at a specific time and timezone. You can also use supported Slack or Notion events, such as a matching message, new database page, or review-status change.
For GitHub changes, use the connected GitHub tools during a scheduled run to inspect merged PRs. Don’t assume every integration has a native change trigger. Scheduled review also works for page-body changes that your available event triggers don’t cover.
Test on a small source set, inspect the proposals, then publish the schedule. Add direct context editing only after the review path is working.
A schedule does not grant source access. If a source is unavailable, the agent should report the gap—not quietly say that nothing changed.
Optional later: Automate explicitly approved low-risk edits, such as repairing a verified broken link.
Keep changes to metric meaning, source selection, grain, filters, sensitive-data handling, and unresolved human edits behind review.
Confidence is not approval.
This is an example convention, not a tool argument schema:
Question ID: reuse it across queries for the same question.
Execution ID: retain the ID returned by each run, when available.
Definition reference: point to the approved metric or source; record only available versions.
Business context: track it separately so reviewers can distinguish the metric definition from its interpretation.
Keep raw questions, customer identifiers, personal data, secrets, and results out of tags.
Get execution identity from authentication and query history, not model-written metadata.
Store richer context in restricted logs keyed by question and query IDs.
Optional addition to query logging instructions
Example of how to attach metadata to a query
Use the approved execution tool’s metadata capability first. If it does not provide one, a SQL comment can be a lightweight alternative when the tool preserves comments and your logging policy allows it. This is an illustrative convention, not the Data Scout tool schema:
This adds a searchable marker to query text; it does not set Snowflake’s
QUERY_TAGfield.For analytical queries, extend it with the approved
metric_keyanddefinition_reffrom the metadata convention above. Include only references you actually resolved.Reuse one question ID across related queries. The example ID is a placeholder, not an execution ID.
Do not add this comment if the execution tool already attaches equivalent metadata.
Keep secrets, personal data, customer identifiers, raw questions, and results out of the comment.
Example of Notion's Data Scout wrapper
At Notion, this is an implementation example rather than a step in the direct Snowflake setup. The wrapper is tailored to our environment and is not an out-of-the-box component that customers can install or reuse as is. The parts worth adapting are the underlying patterns like standard instructions, structured logging, and metadata added during query execution.
Our run_tagged_query tool accepts SQL and metadata together. Pass native object arguments to the tool rather than adding a comment yourself. This connection-test example intentionally has no datasets, context pages, or metric:
For an analytical query, use the live tool schema to supply the actual datasets, context pages, canonical metric and definition source, filters, and time range when known. Use a short, non-sensitive summary for question, not the raw user prompt. Do not copy these argument names into a different connection unless its schema supports them.
The wrapper appends structured metadata as a JSON SQL comment before sending the statement to the upstream Snowflake MCP and emits execution telemetry. That comment alone does not establish that Snowflake’s actual QUERY_TAG field is populated. Retain execution IDs when returned; do not treat a question ID or successful execution as proof that the answer is correct.
Example of how to query tags and history in Snowflake
A SQL comment is not a Snowflake QUERY_TAG.
Set tags through the session parameter on the actual execution connection; don’t assume separate calls share a session.
If your tools preserve only SQL comments, treat them as query-text markers, not populated
QUERY_TAGfields.
Inspect tagged queries
This example requires approved query-history access and the JSON convention above in the actual QUERY_TAG. Otherwise, the filter won’t find your queries.
Use this prompt to review agent query patterns
Des questions ?