How to manage multiple Gmail accounts like a pro
Google makes it easy for you to create several Gmail accounts, but managing them all can quickly become overwhelming. Whether you already handle multiple Gmail accounts or plan to create more, it's easy to lose track of inboxes. The key is learning how to manage multiple Gmail accounts effectively from the start.
Our guide will help you get a hang of managing multiple Gmail accounts by explaining:
How many Gmail accounts you can create
How to manage multiple Gmail accounts in one inbox
What the best ways to manage multiple Gmail accounts effectively are
How many Gmail accounts can you create?
Google allows you to create as many Gmail accounts as you need, though within limitations. You can open up to four email accounts under one phone number. This enables you to create emails for work, personal, and family purposes and verify them with the same number. If you need to create more accounts, you’ll need another phone number for verification.
However, suspicious activities like opening several accounts in rapid succession under the same IP address can trigger Google’s alarms and lead to restrictions. Its anti-fraud measures monitor and flag unusual activities like mass account creation. To avoid such restrictions, it’s best to create accounts gradually.
How to add another Gmail account
You can link up to five email addresses to your default Gmail account. That includes both Gmail addresses and non-Gmail accounts, such as Yahoo and Outlook.
Here’s how to add another Gmail account on your computer or mobile:
Click on your profile picture
Select Add account
Enter the email address and password of your second account
Select the type of account you want to add (on mobile)
Follow the on-screen prompts to finish the setup
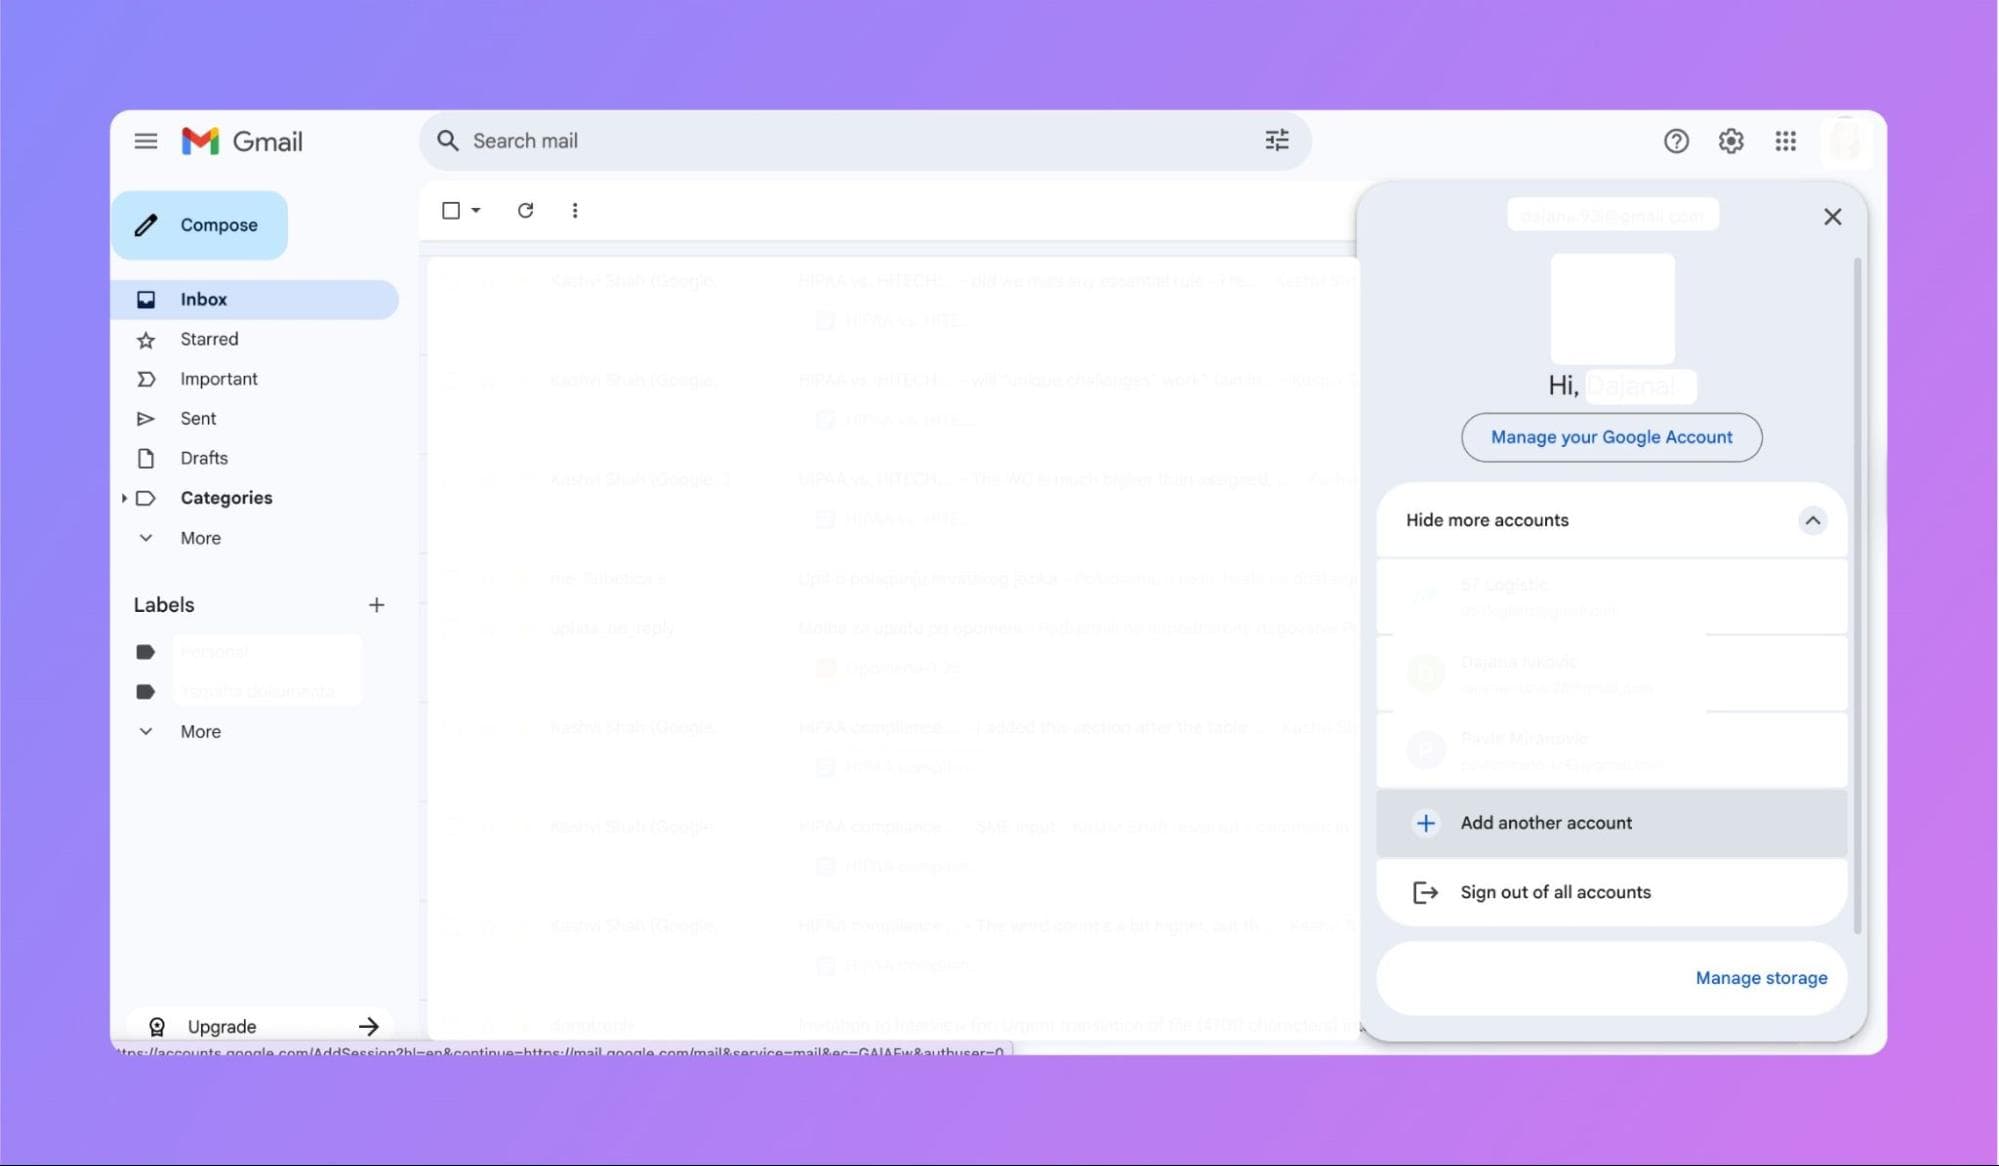
Once you’ve added your accounts, you can use Gmail’s account switcher to move between emails without signing in and out. It’s super simple—just click on your profile picture and select the account you want.
Benefits of having multiple Gmail accounts
While having several Gmail accounts might seem tiresome, it has its perks. With the right strategy (which we’ll explore later in the blog), multiple accounts can simplify your day-to-day workflows.
Here are some of the main benefits of managing multiple Gmail accounts:
1. Improved organization
Creating different accounts for different purposes can help you be more focused and organized. When you separate your personal emails from your work emails or newsletters, it’s easier to stay on top of your correspondence.
Organizing your accounts this way can also minimize distractions. For example, during work hours, you can turn off notifications for your personal account and only focus on work-related emails.
2. Strengthened security
Having multiple Gmail accounts can also be a smart security move. For example, you can use a dedicated email for sensitive activities, such as online banking or two-factor authentication (2FA). This setup helps reduce the risk if the other account gets compromised.
On top of that, if your email account gets hacked or you start receiving phishing attempts, the damage will be contained to a single account. To double up the protection measure, you can log in to different platforms with different accounts.
3. Reduced clutter
One of the biggest problems with running a single account is clutter. Those endless promotions, subscriptions, and social media updates, pile up in one crammed inbox. Sounds overwhelming, doesn’t it? Multiple accounts can soften the noise, and keep your inboxes clean at all times.
4. Easier management of spam emails
Marketing emails and spam can cram your inbox if you use one account for everything. The best way to keep your primary email spam-free is to create another account for free trials, one-time downloads, or unfamiliar website sign-ups. This account can be your spam buffer and keep the junk mail out of sight.
5. Increased Google storage capacity
Each Google account has 15 GB of free storage distributed across Gmail, Google Drive, and Google Photos. That can fill up pretty quickly if you back up your photos to Google or manage large files.
Unless you don’t mind paying for a storage upgrade, you can create multiple accounts and extend your overall storage as a free user. You can also use your secondary account to archive old emails or the ones with large attachments and free up space on your primary Gmail account.
Can you manage multiple Gmail accounts in one inbox?
Gmail offers built-in features that let you manage multiple accounts in one inbox. This way, you’ll be able to receive all your emails in a single inbox.
If you decide to connect your accounts, you’ll first need to enable POP access in the email account you’ll be linking. The process differs depending on your email provider, so here’s how to do it in Gmail:
Select Settings, and then See all settings
Go to the Forwarding and POP/IMAP tab
Under the POP download section, select Enable POP for all mail and Enable POP for mail that arrives from now on
Under When messages are accessed with POP, choose what will happen to Gmail’s copy of the message:
Keep Gmail’s copy in the Inbox
Mark Gmail’s copy as read
Archive Gmail’s copy
Delete Gmail’s copy
Click Save changes
After that, you need to enable Gmail Mail Fetcher. You can only set up this feature on your computer by following these steps:
Sign in to the Gmail account on your computer
Click Settings, and then select See all settings
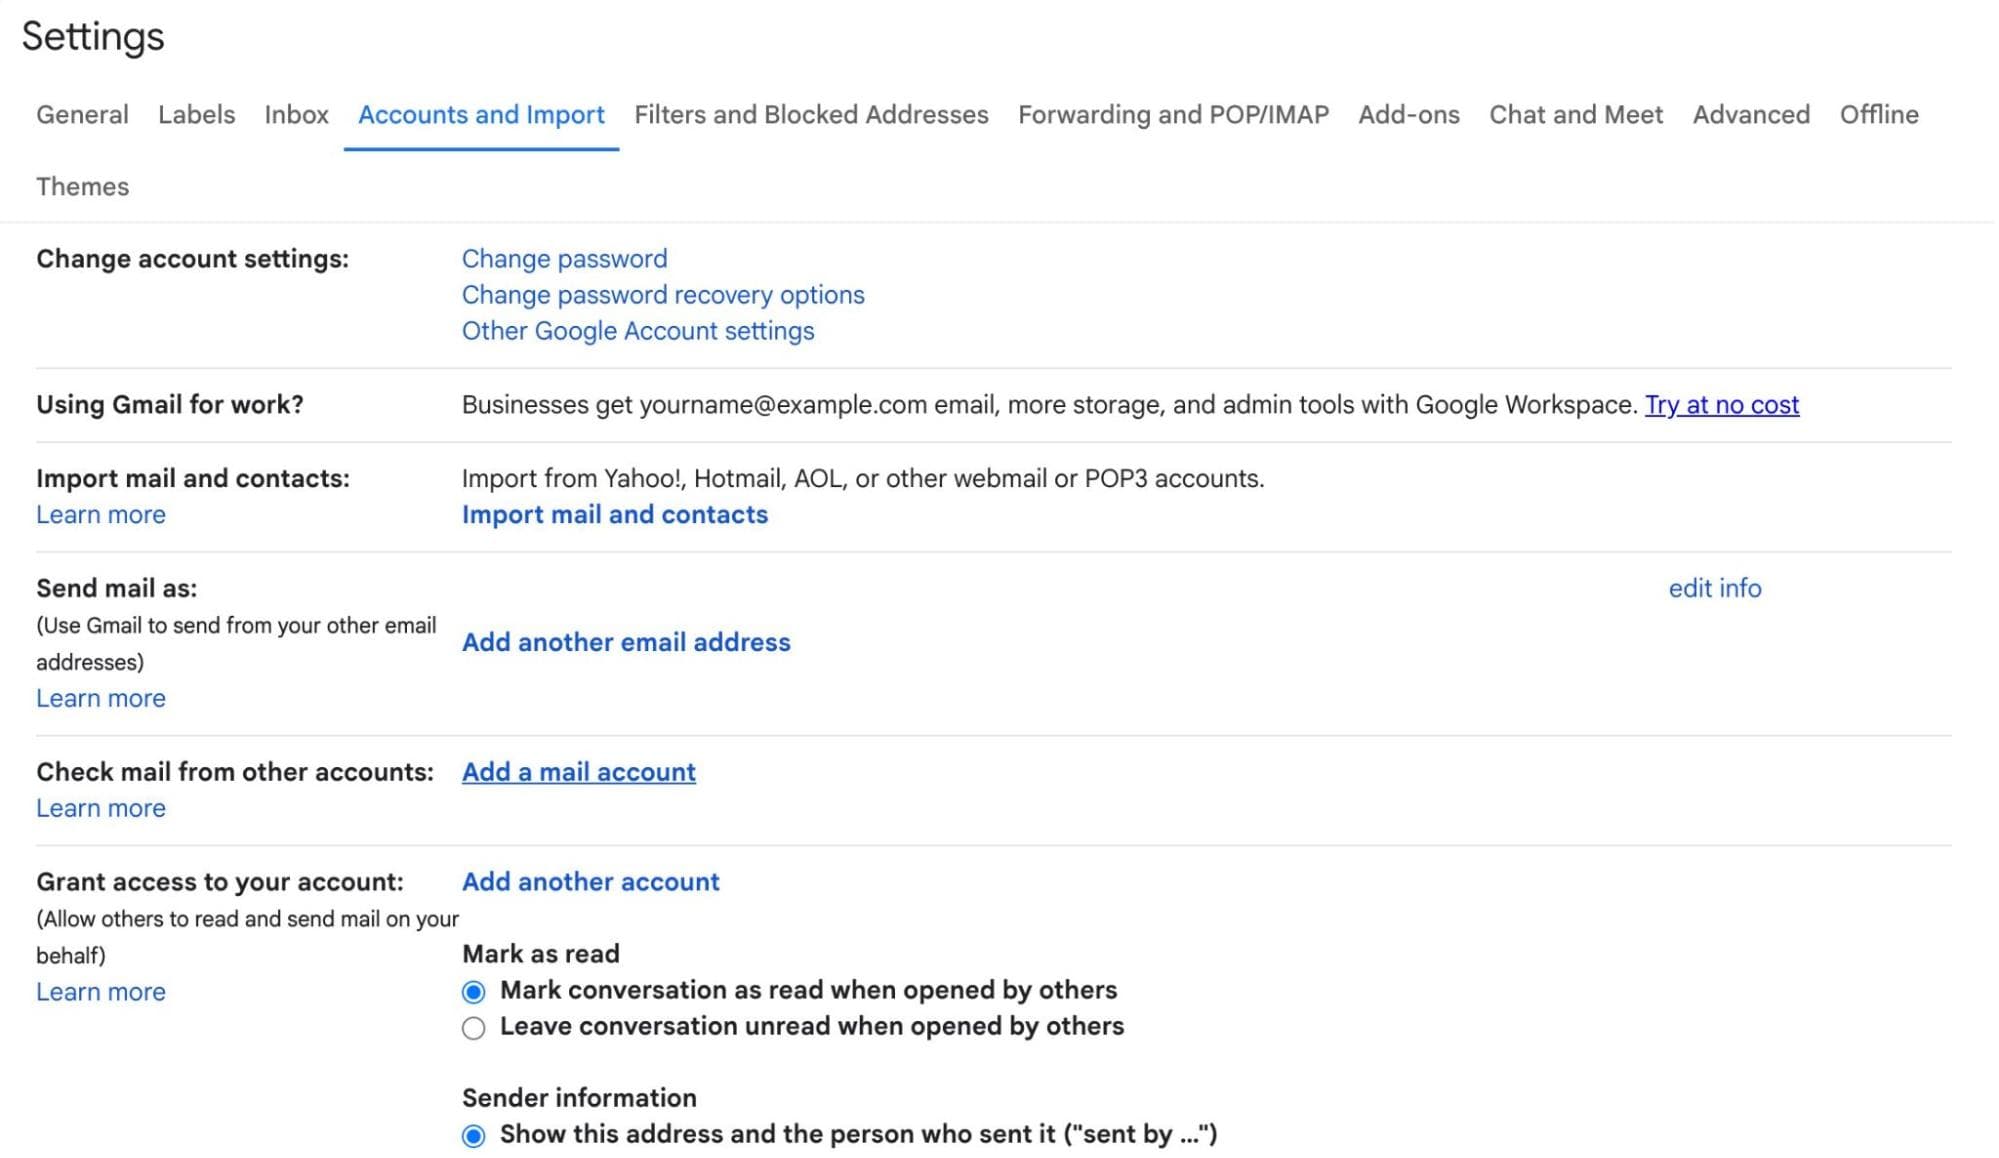
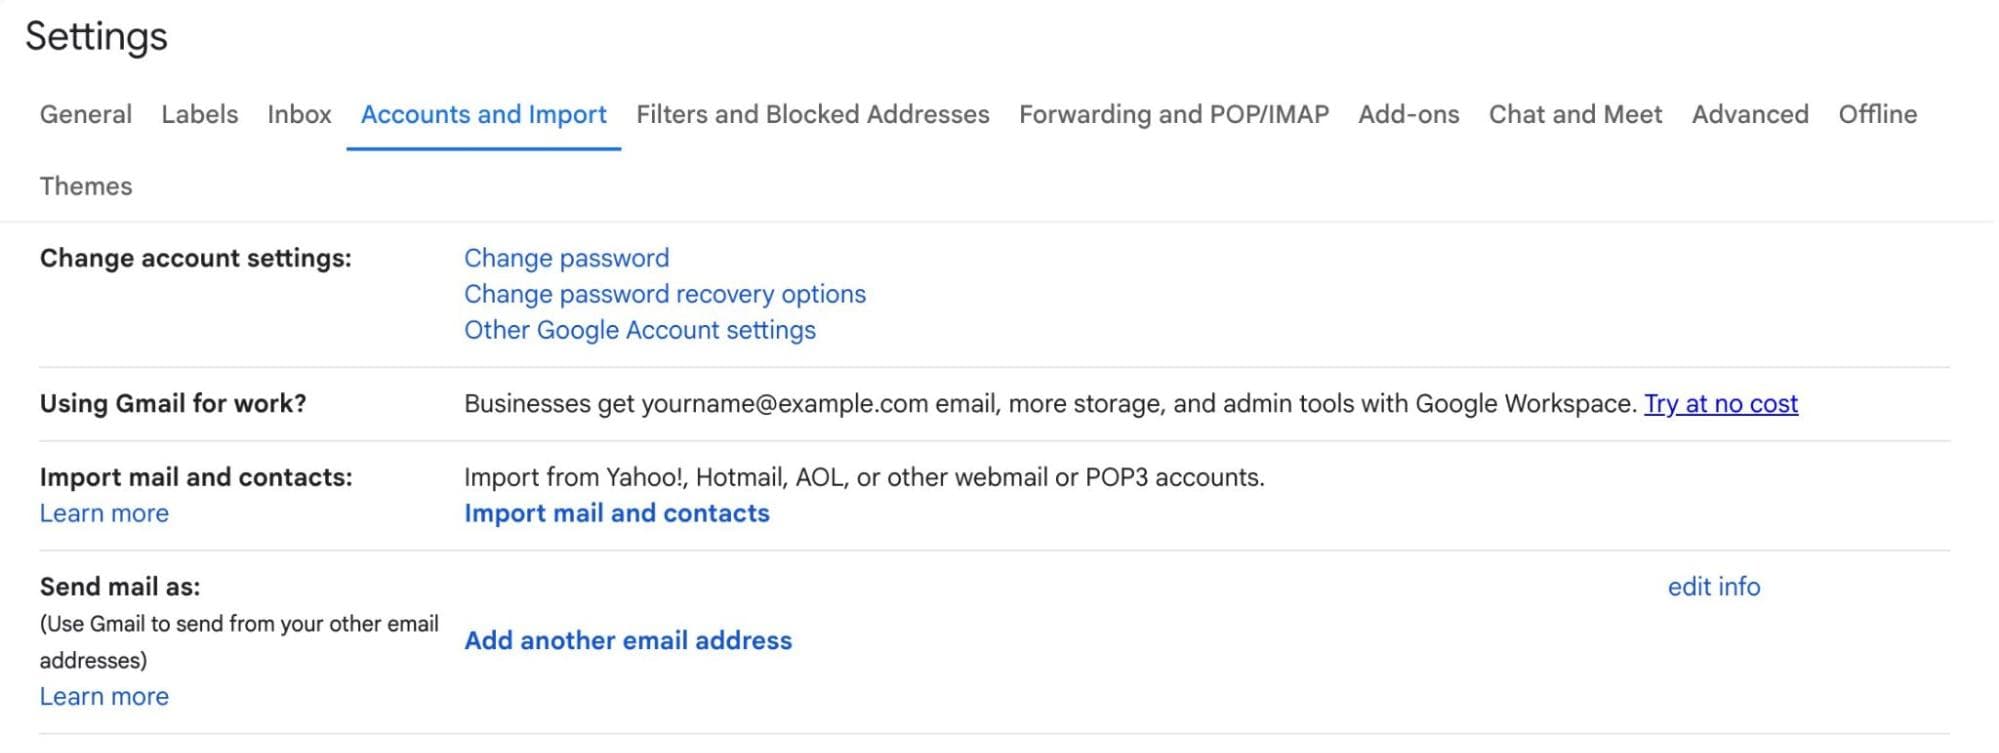
Select the Accounts and Import option or the Accounts tab
Under the Check mail from other accounts section, select Add a mail account
Enter the email address of the other account
Click Next
Import your emails from the other account
Type your username and password, and select the settings you want
Click Add account
5 tips to help you manage multiple Gmail accounts
While Google makes it fairly easy for you to switch between accounts and consolidate emails, managing multiple Gmail accounts can still be overwhelming. From mixing accounts and missing important emails to nonstop notifications, it can turn into a headache.
To ensure you have a handle on all your Gmail accounts, we’ve put together five must-know organization tips below:
1. Choose a default account
Google uses the first account you create or log in to as your default. However, if that account isn’t the one you use the most, you might run into hiccups like sending emails from the wrong address or missing important messages.
Have you already logged in with an account you don’t use often? No problem—you can change your default account at any time by:
Clicking on your profile picture
Selecting Sign out of all accounts
Logging in to your primary account
Adding other accounts
2. Set up the “email forwarding” and “send mail as” features
Google can act somewhat as your personal assistant by forwarding emails from other accounts to the one you choose. It can also reply from a default email address regardless of where you’ve received the email. So, whether you want to centralize your communication or avoid missing important messages scattered across different inboxes, this can be the way to do it.
If you want to forward emails to your main account, change these settings in your other accounts:
Select the Settings icon
Under the Quick Settings section, select See all settings
Go to the Forwarding and POP/IMAP tab
Under Forwarding:, enter the email address you want to forward your emails to
Click Save changes at the bottom of the page

Now that we've got that covered, let's tackle the replying feature. To reply to emails with your primary account, switch to your secondary account, and make these changes:
Select the Settings icon
Under the Quick Settings section, select See all settings
Go to the Accounts and Import or Accounts tab
Under Send mail as:, select Add another email address
Enter the primary email address you want to reply with, then click Next Step
Select the Send Verification button
Verify the email address
Choose your default way of replying
3. Use labels and filters
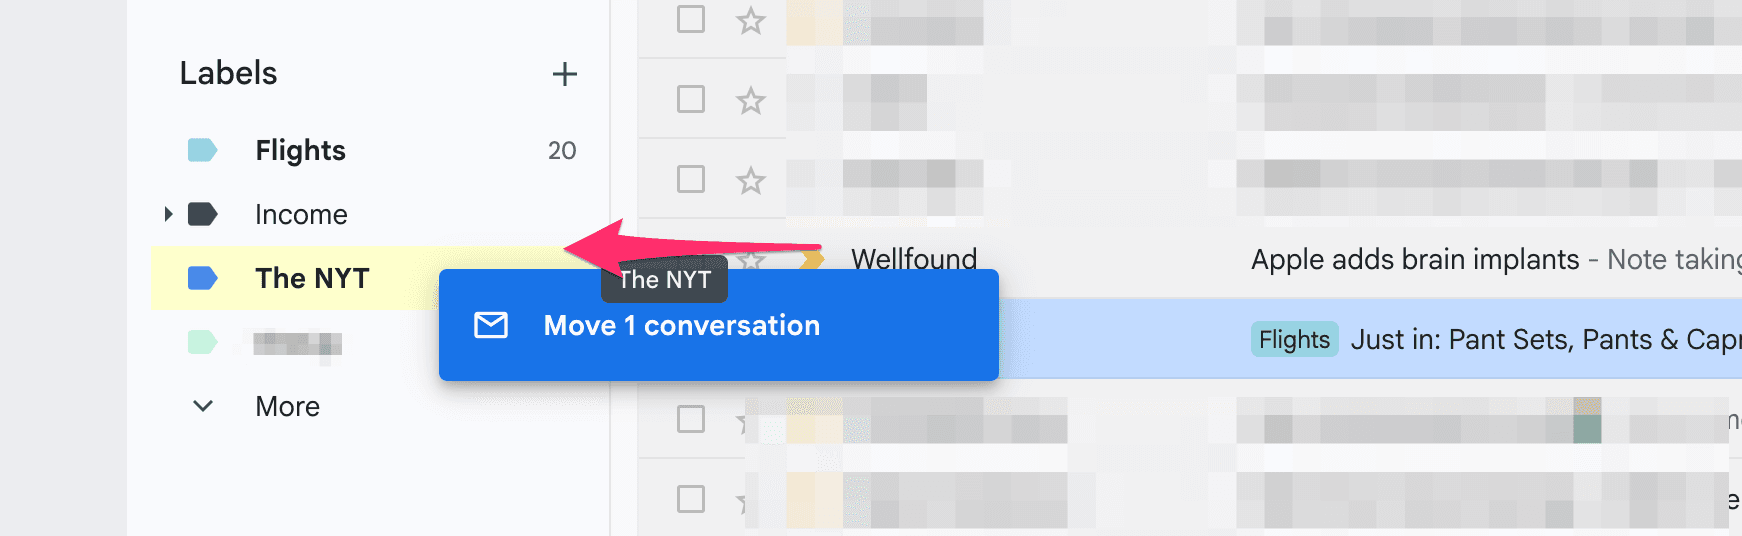
If you decide to centralize your messages, your inbox can quickly become cluttered and hard to navigate. Fortunately, a few simple Gmail organization features, such as labels and filters, can solve that issue.
Gmail labels are tags that you can attach to your emails to separate messages according to different purposes. This organizational feature can help you categorize your emails and make them easier to locate later on.
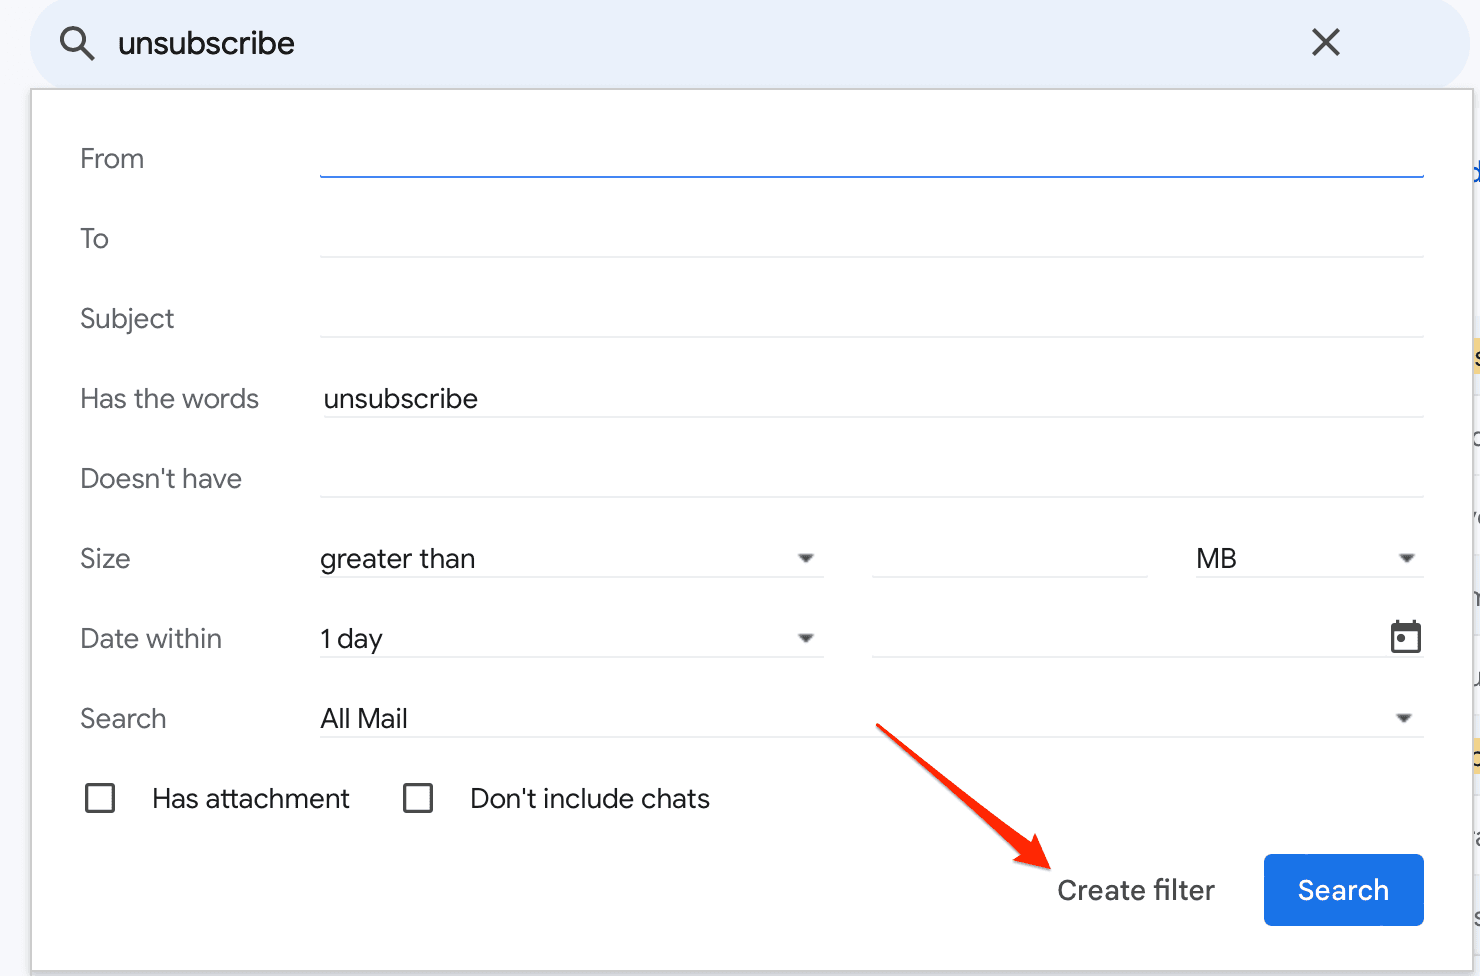
Another way to simplify managing your inbox is by using filters, also known as rules. Based on your criteria, filters can automate various actions. For example, you can set filters to:
Attach labels to incoming emails
Sort emails into categories like Promotions or Social
Delete or archive messages from certain senders
Mark emails as read
Keep reading: Not sure how labels in Gmail differ from traditional folders? Our breakdown of labels vs. folders can help.
4. Enable notifications for priority accounts only
If you log into several Gmail accounts, you might get distracted by constant pings and alerts. Most of those probably won’t be urgent, but it will take up your time and attention to constantly check your emails.
To avoid notification overload, you can enable notifications for your default account only or the accounts you use most often. If you don’t want to turn them off completely, you can adjust them to notify you of relevant emails. It is an easy tweak that will keep those unnecessary distractions away.
Here’s how to turn the notifications off on a computer:
Switch to the account you want to set up notifications for
Go to Settings, and then See all settings
Under the General tab, scroll down to Desktop notifications
Choose (depending on your wants):
New mail notifications on
Important mail notifications on
Mail notifications off
Click Save changes
You’ll take similar steps to disable or adjust notifications on your mobile—all you need to do is:
Open the Gmail app
Select the Menu icon at the top left
Choose the account you want to set up notifications for
Click Notifications
Choose (depending on your wants):
All
High priority only
None
5. Streamline organizing emails with a dedicated Gmail client
Managing multiple Gmail accounts can be much easier if you streamline a big chunk of your tasks—and that’s what Gmail clients are for.
A dedicated Gmail client can handle repetitive organization activities that take up your time and effort. Once you delegate organizational tasks to a third-party platform, your inbox will become much more manageable.
Additionally, some of these tools leverage AI to optimize your email management by:
Automatically labeling and sorting emails
Filtering out irrelevant messages
Generating replies
Writing emails
Many Gmail clients stop at basic features—Notion Mail goes way beyond. It delivers next-level inbox intelligence that can streamline your entire email management. You can just connect it to your account and start automating and organizing right away. But, before you take a leap, let’s take a glance at what it brings to the table.
Notion Mail: AI-driven solution that does it all
As an AI-native Gmail client, Notion Mail can streamline and automate most of your busywork of managing an inbox. It can support your primary inbox with automated sorting and labeling, as well as custom views, making organizing multiple accounts far simpler.
If you’d like to juggle different Gmail accounts with Notion Mail, do so by connecting multiple accounts and switching between them as needed. The platform is free to use, so you don’t have to factor in the cost.
This builder-focused solution comes with a variety of powerful features designed to save you time and effort, such as built-in scheduling with Notion Calendar. You can take a look at some of its other time-saving functionalities in the table below:
Feature | What it does |
AI autopilot | Automates labeling, filtering, and prioritizing emails based on simple prompts |
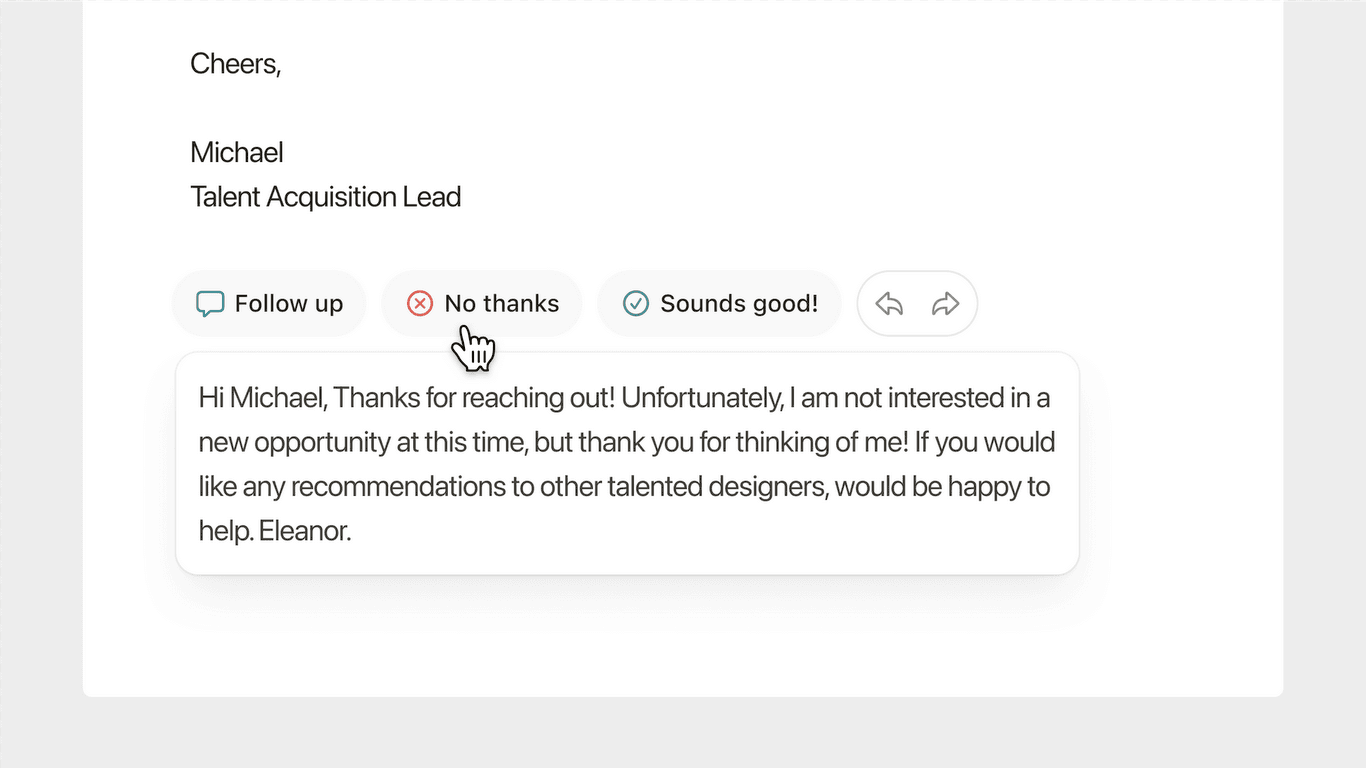
AI-suggested replies | Provides short replies to emails |
One-click email templates | Allows you to choose among ready-to-use templates to speed up writing emails |
Email summaries | Summarizes lengthy emails and long email threads, saving you a ton of time |
The Notion Mail experience is highly personalized, as it adapts to your habits and refines how your inbox is organized. With its custom views, you can create “an inbox within an inbox” and have different communication sectors for different workflows (such as sales, marketing, etc.). This way, even if you’re managing a high volume of emails, it will feel intuitive.
We’ve only scratched the surface here, as Notion Mail offers so much more, including:
Keyboard shortcuts for common actions
Productivity-focused features
One-click unsubscribe option
Context-rich email drafting
Sign up for Notion Mail
Getting started with Notion Mail takes less than a minute. All you have to do is connect your Google or Gmail account, and you’re all set.
The free account comes with all the basic features, including many AI functionalities. To level up automation, get the Notion AI add-on.
Bonus reads: Refer to our library of helpful Gmail organization guides:
